Managing Proforma Invoices and Transactions
A Proforma Invoice (PI) is a preliminary invoice issued before the final invoice and is typically used to facilitate advance payments for added services. If you require specific services or resources, you can submit your requirements to the admin.
Based on the requested services, estimated charges, and duration the admin generates a proforma invoice. While adding the advance payment, the transaction can be made against open Proforma Invoices. Admins can add transactions that have been made by the subscriber against a Proforma Invoice or multiple Proforma Invoices.
This section covers the following topics:
Generating a Proforma Invoice
To generate a Proforma Invoice for a particular account, follow these steps:
- Navigate to Accounts > Accounts Management. The following screen appears:
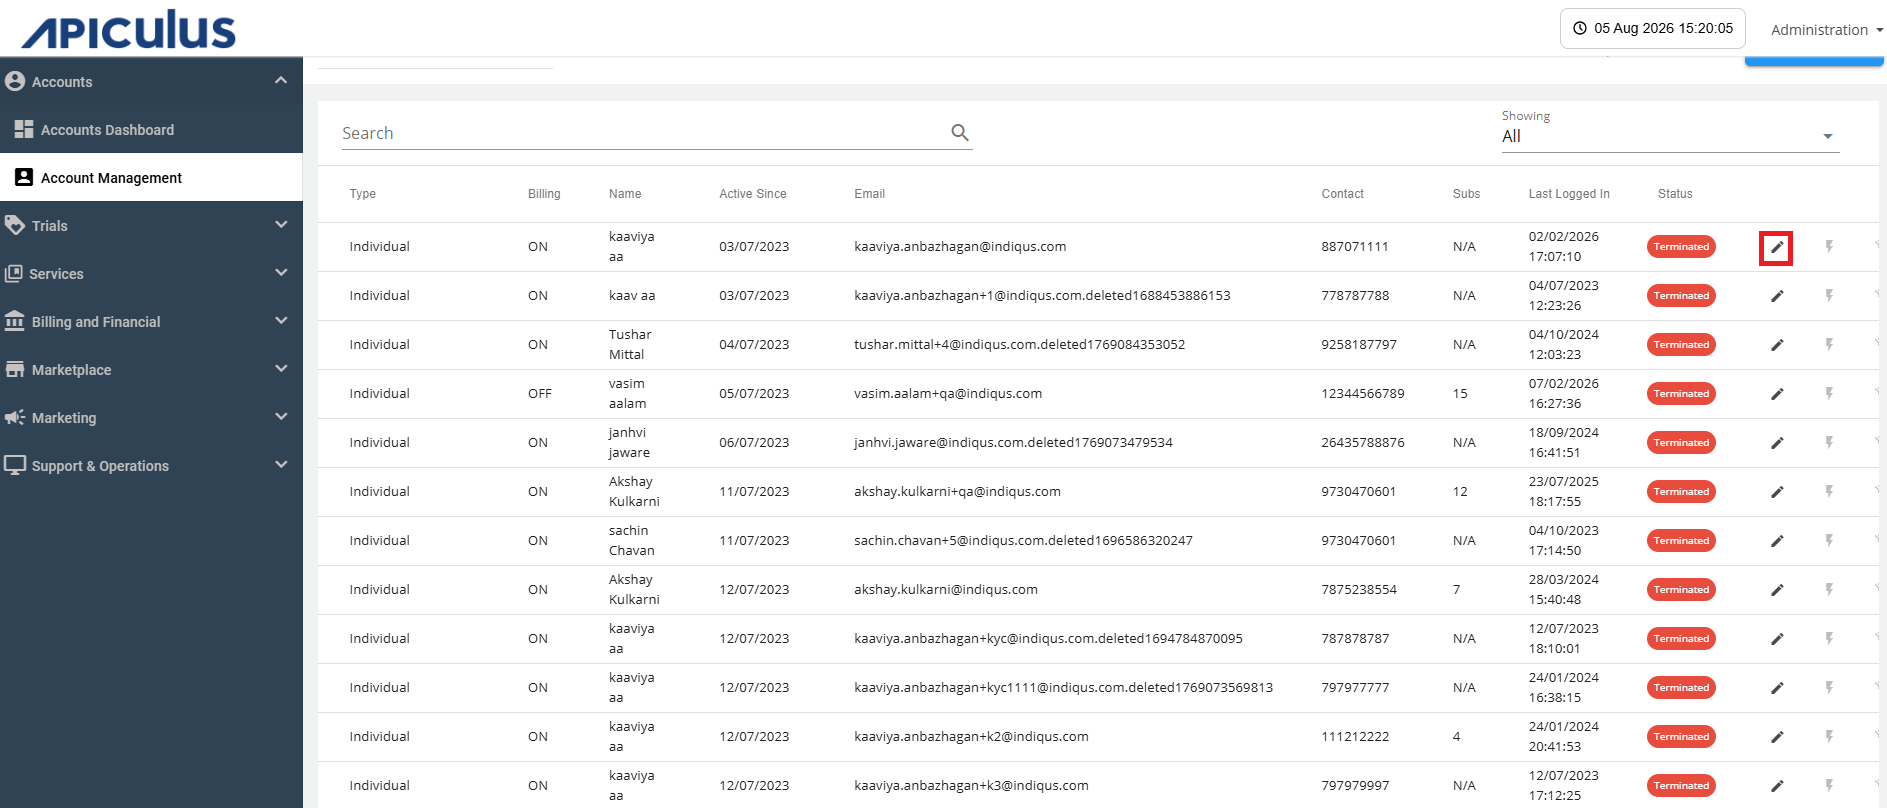
- Click the Edit icon and navigate to Proforma Invoice tab. The following screen appears:
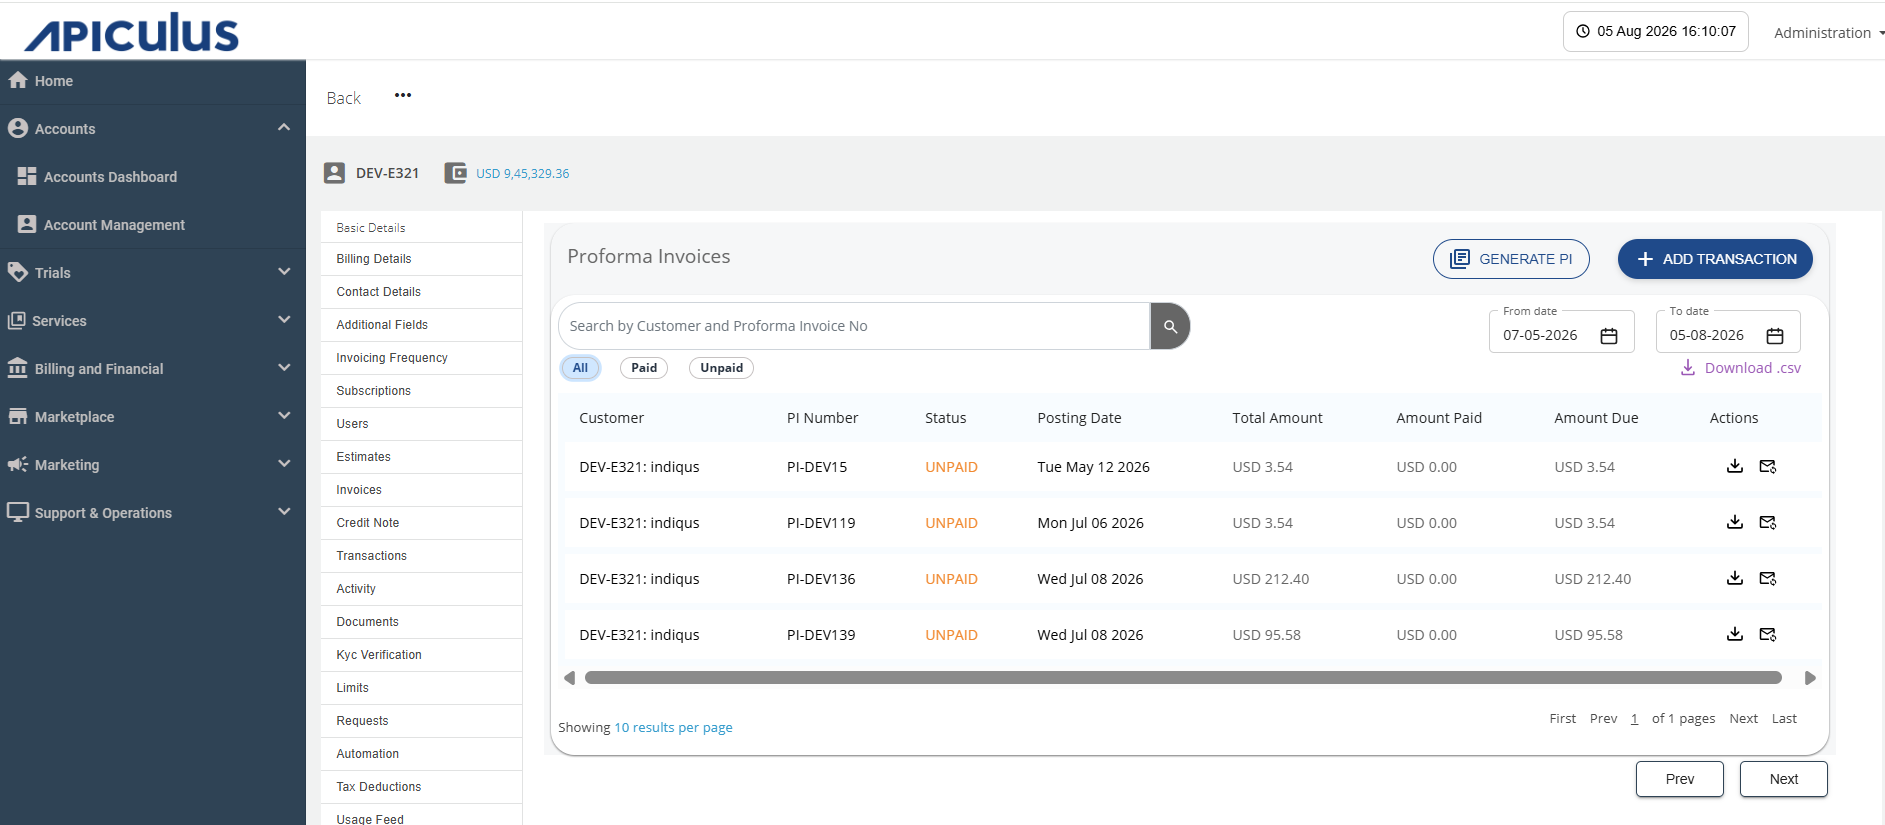
- Click the Generate PI button. The following screen appears:
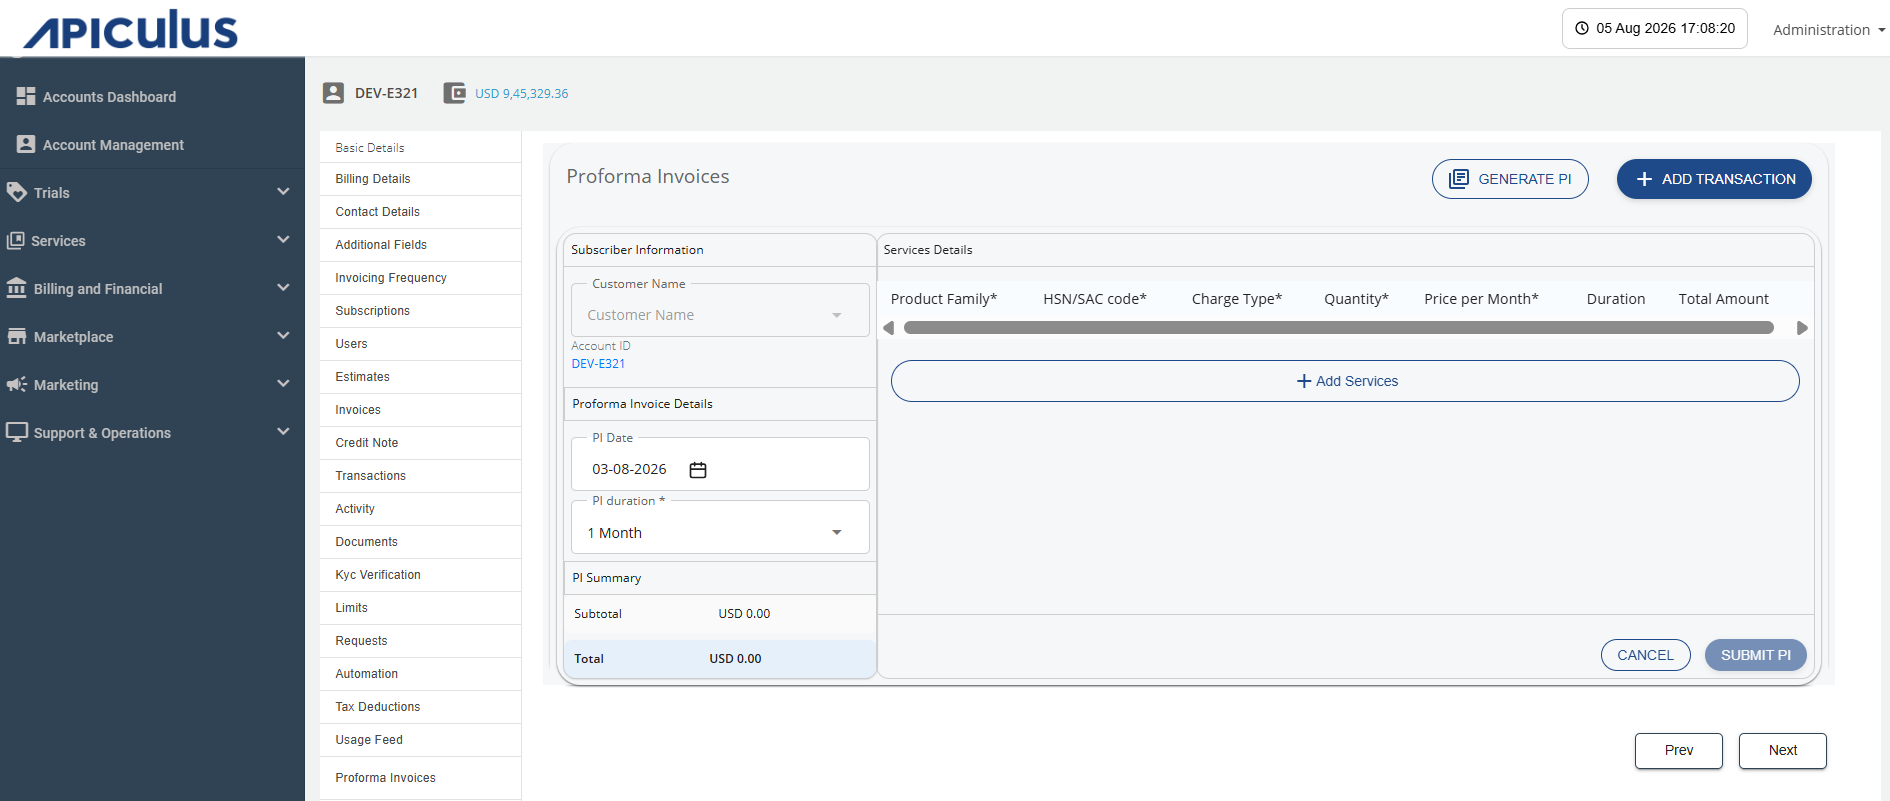
- Provide the following details:
- Select the PI Date.
- Select the PI Duration from the dropdown menu (1 month, 3 months, 6 months, 9 months, or 12 months).
- Click the Add Services button. The following screen appears:
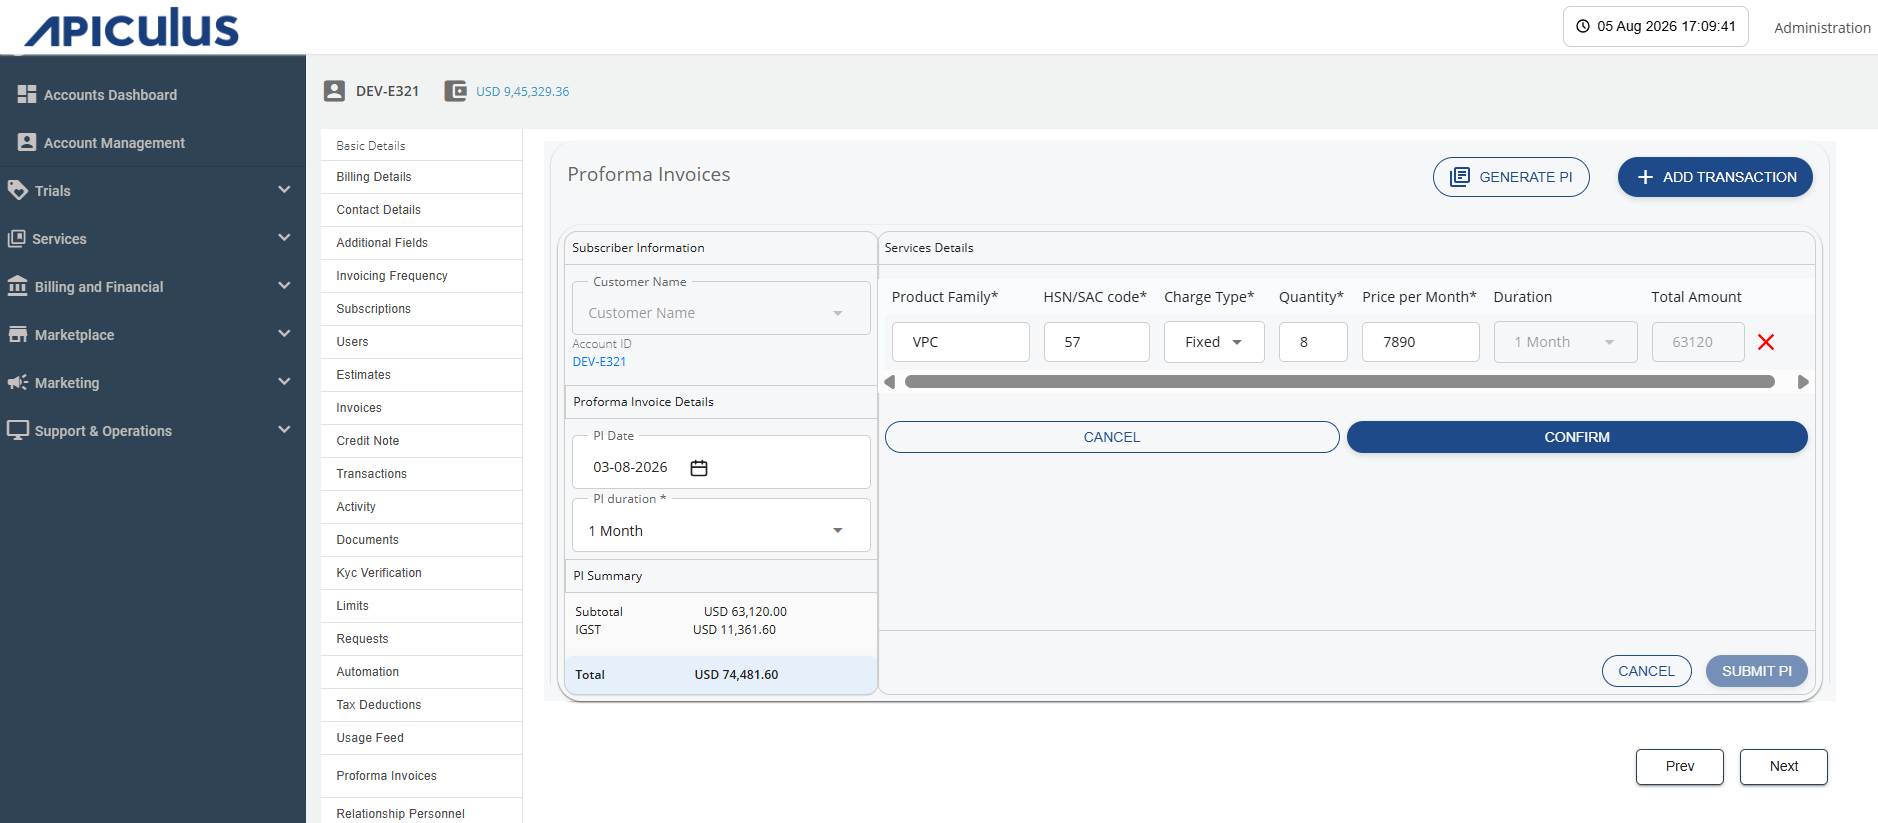
- Provide the following details:
- Product Family
- HSN/SAC Code
- Charge Type (Fixed, Usage, or One-time)
- Quantity
- Monthly Price
noteThe duration is fixed and is applied uniformly to all the services included in the proforma invoice. It cannot be modified for individual services.
- Click the Confirm button. After the confirmation, the details get added as shown in the following screen:
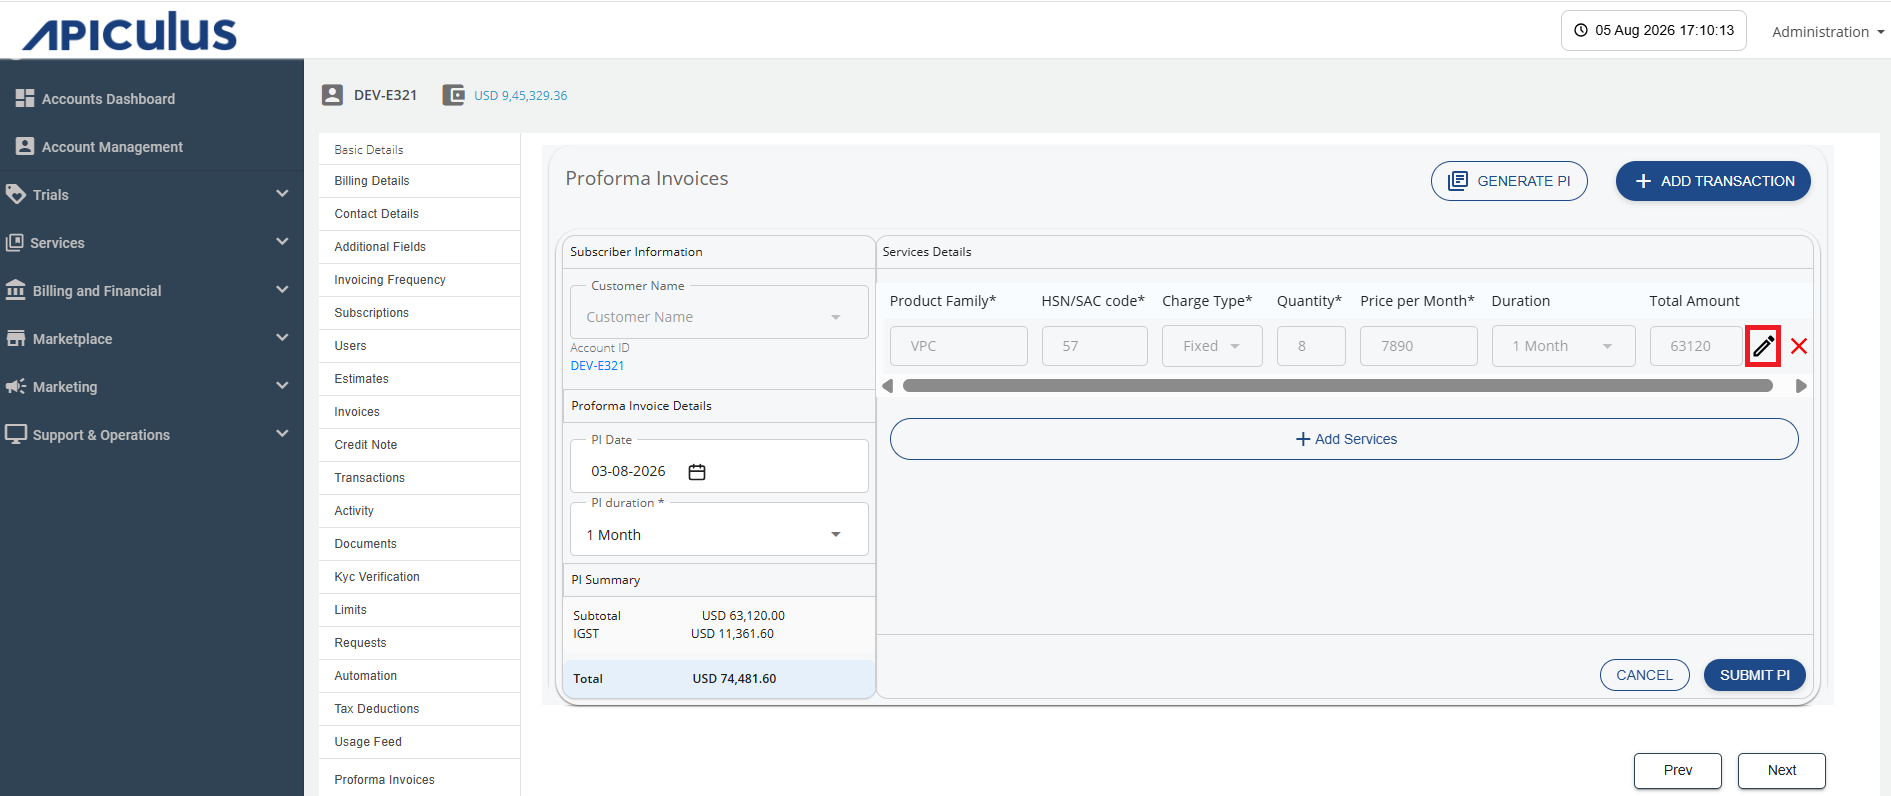
- To add additional services to the proforma invoice, click the Add Services button. You can also modify an existing service by clicking the Edit icon (highlighted in red).
- Review the PI Summary and click the Submit PI button. The following screen appears:
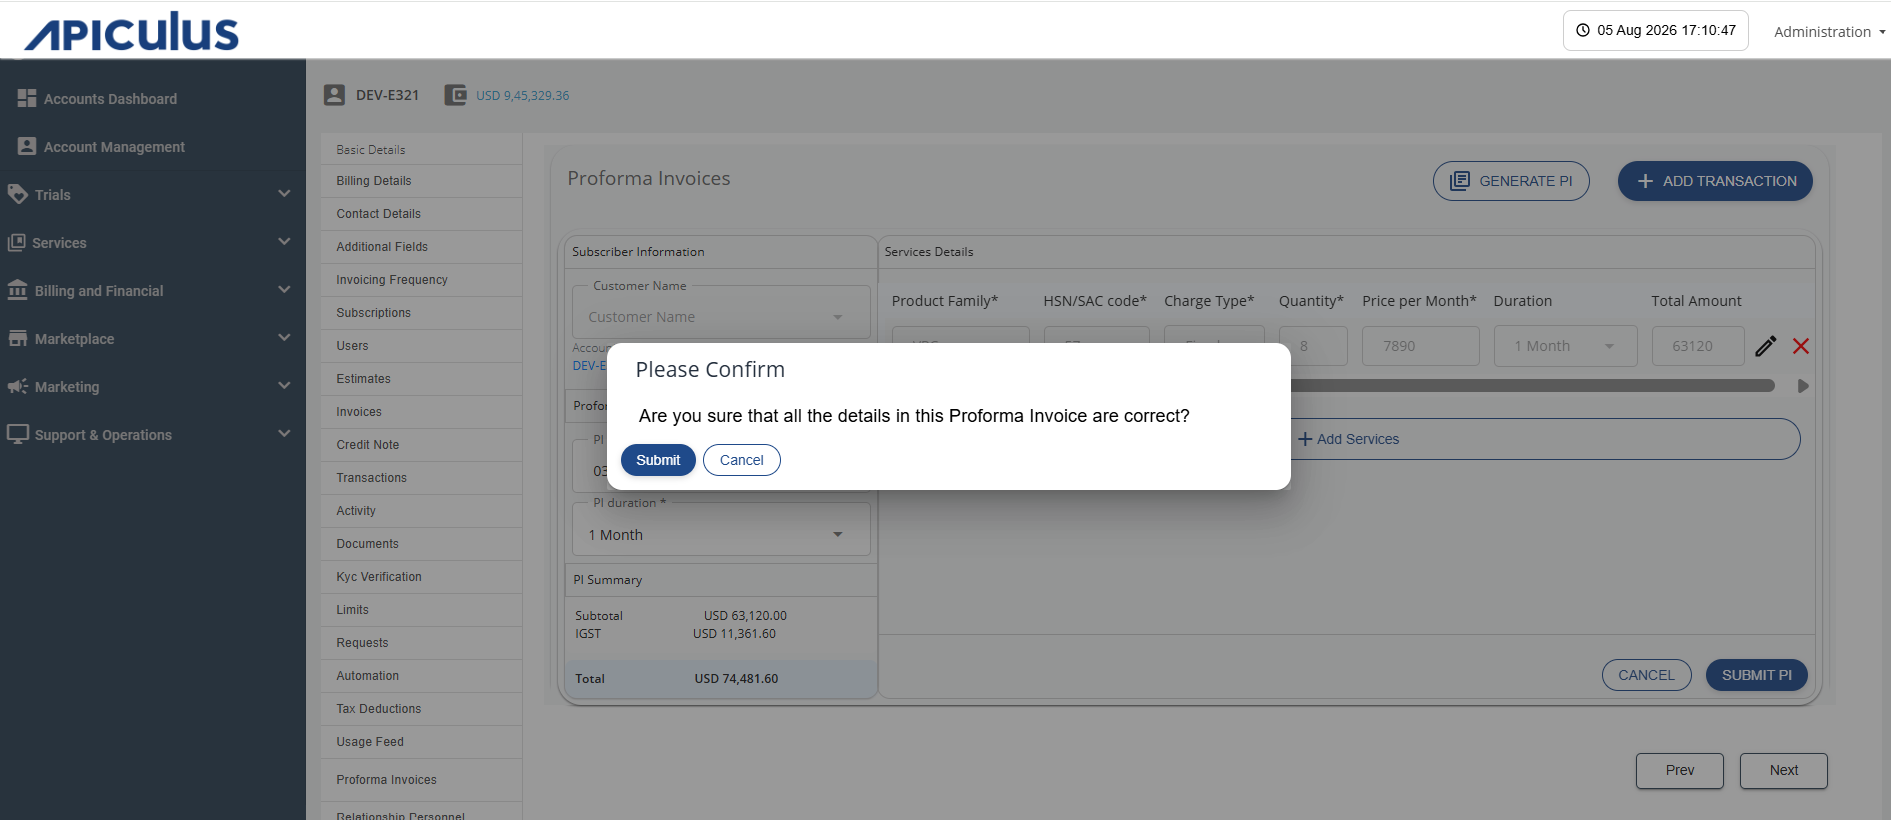
- Click the Submit button.
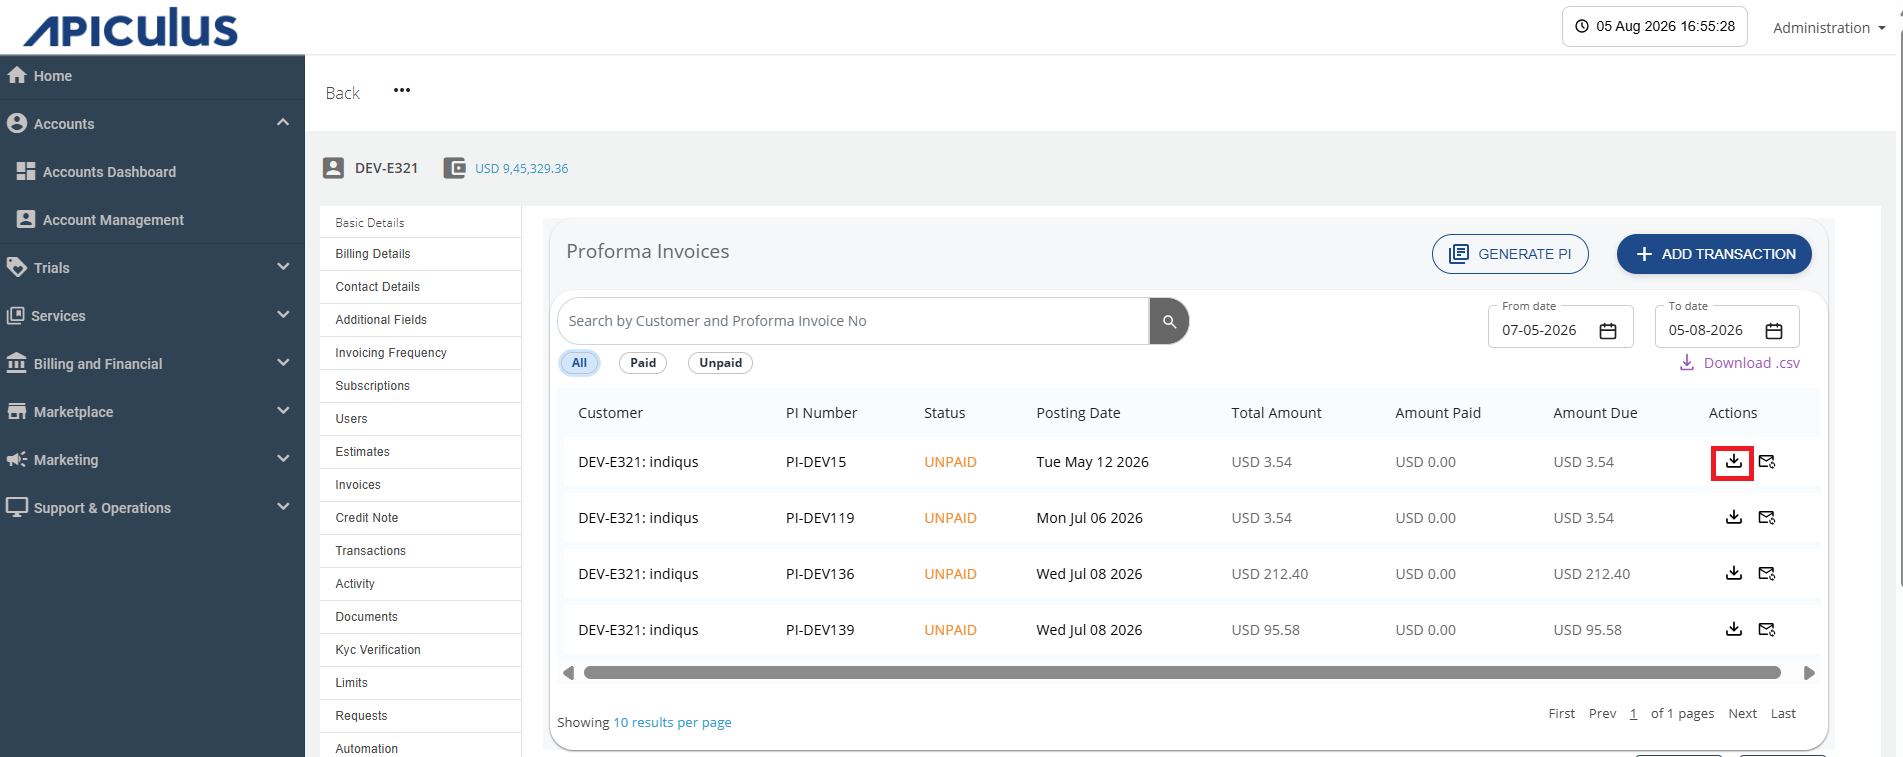
Downloading Proforma Invoice
To download the Proforma Invoice, click the Download icon (highlighted in red).
Resending Proforma Invoice
To resend the Proforma Invoice, follow these steps:
- Click the Resend proforma invoice icon (highlighted in red).
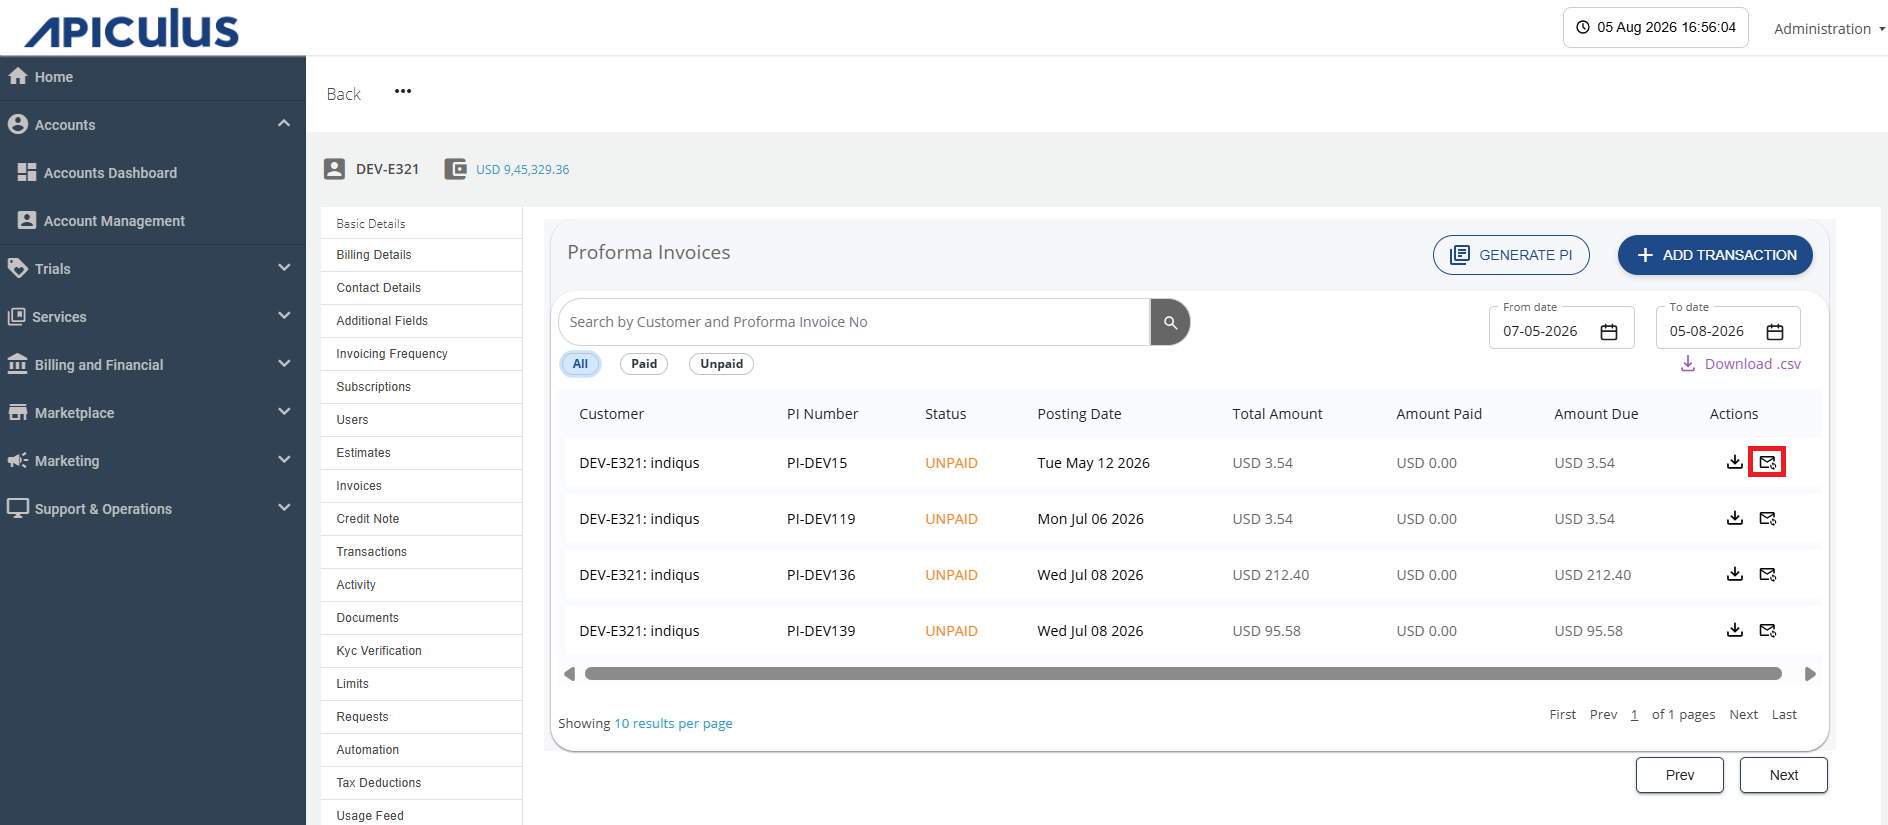 The following screen appears: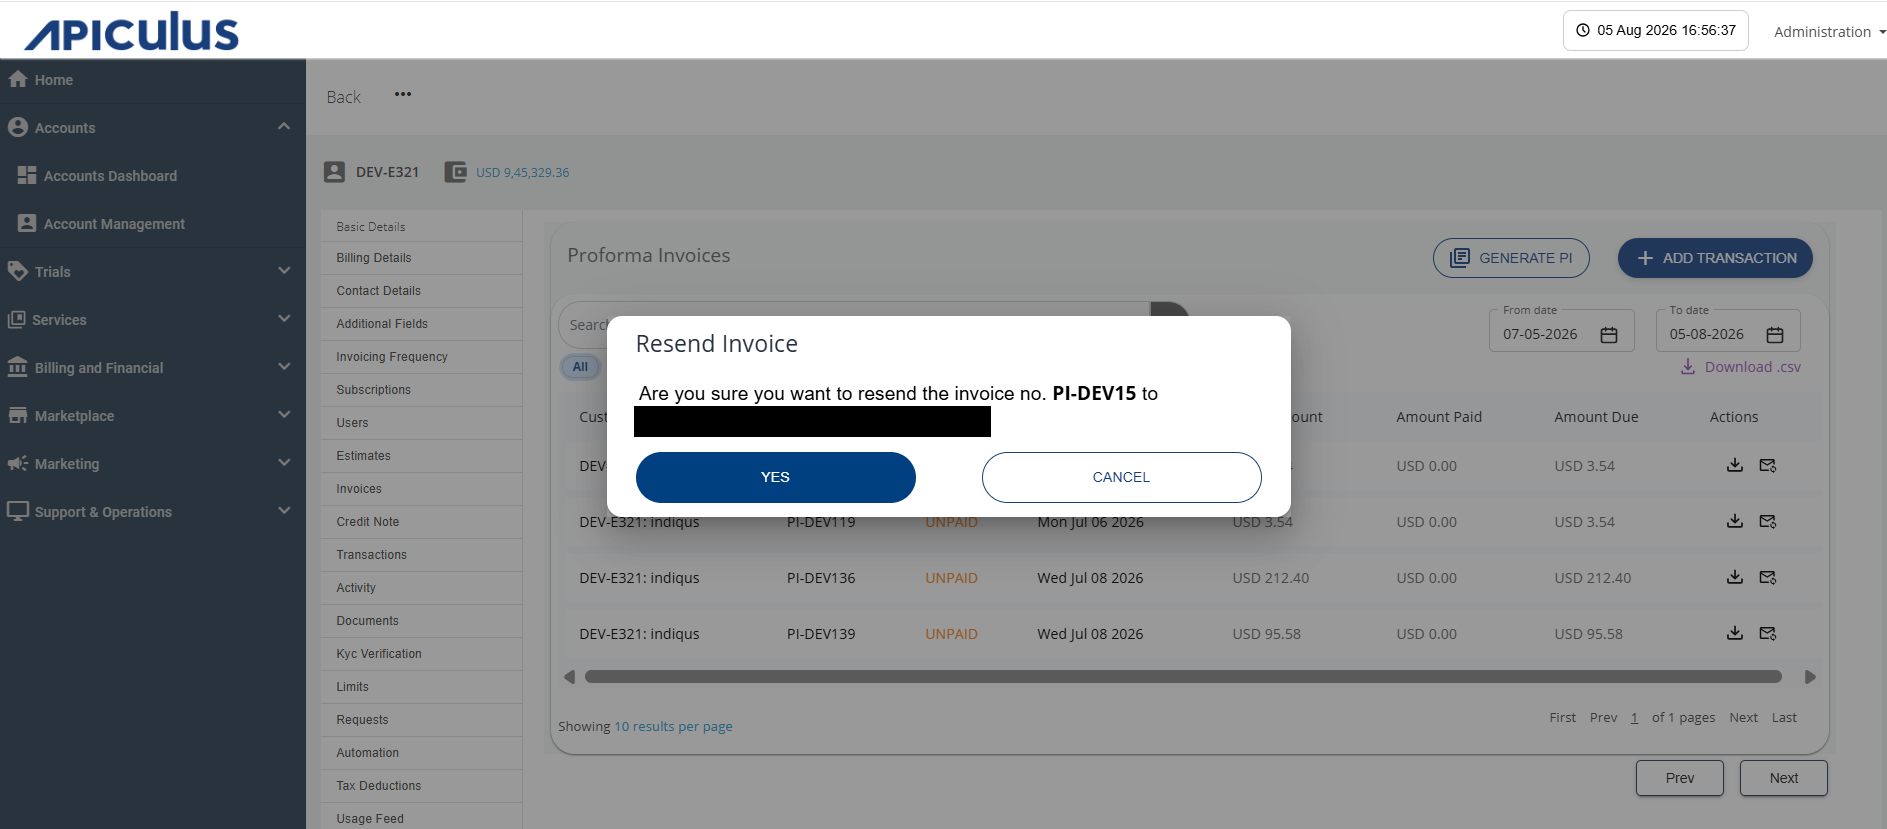
- Click the Yes button.
Adding a Transaction
You can add a transaction against a single or multiple Proforma Invoices in a single payment. To do this, follow these steps:
- Click the Add Transaction button. The following screen appears:
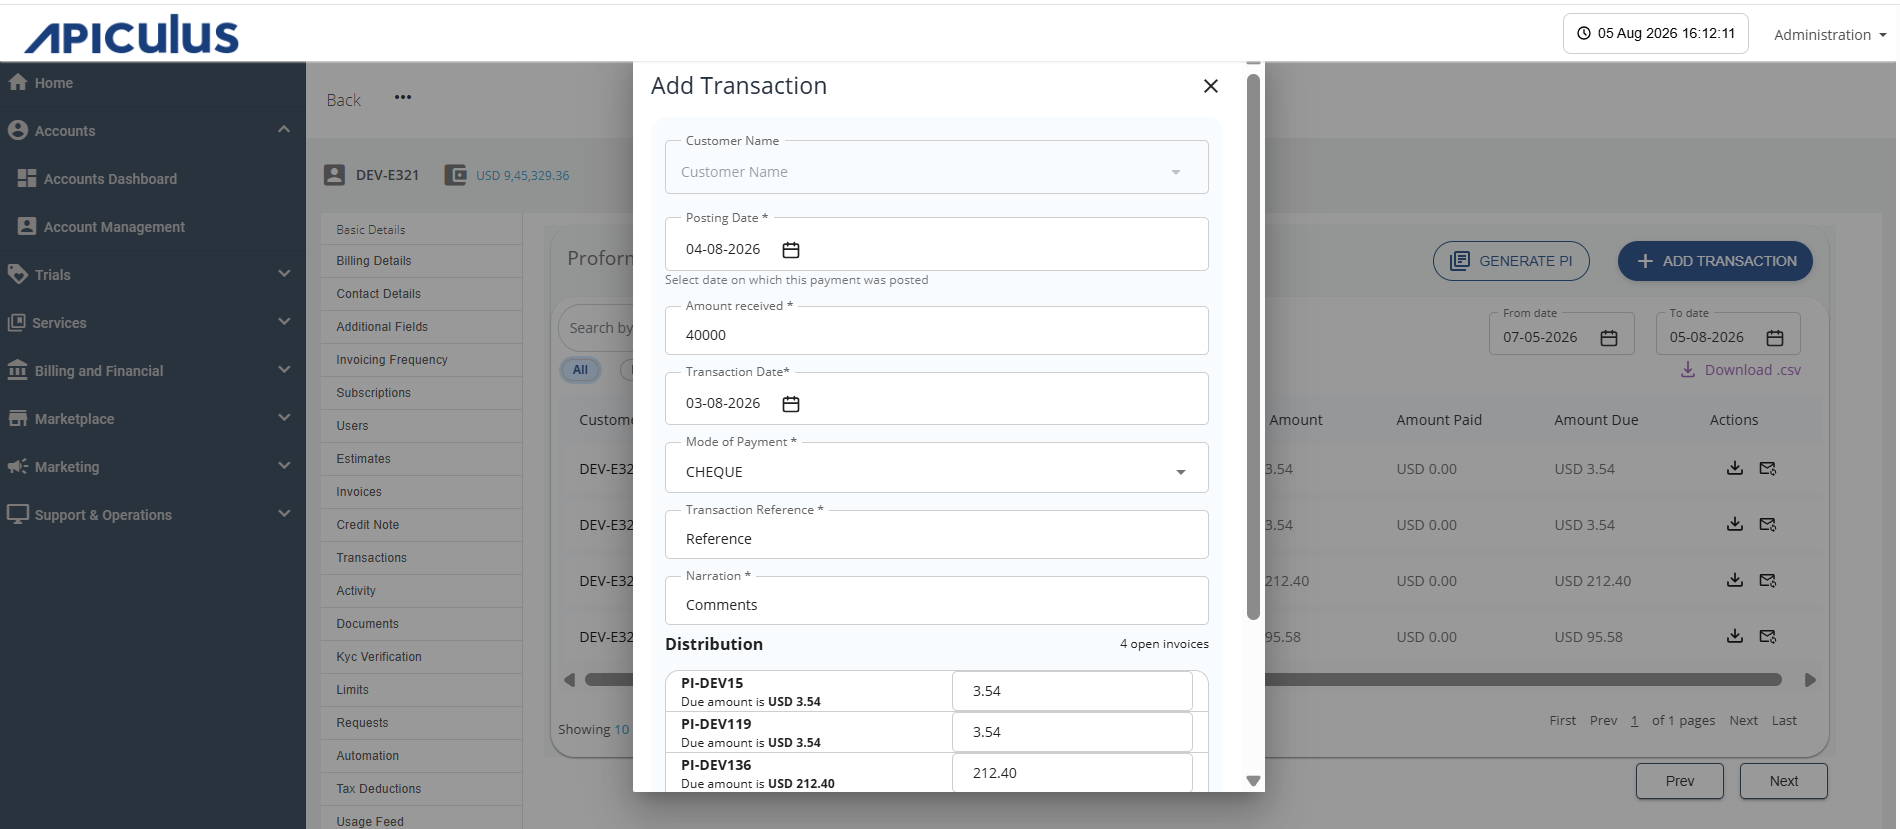
- Provide the following details:
- Posting Date
- Amount Received
- Transaction Date
- Payment Mode
- Transaction Reference
- Narration
- An editable table is displayed, allowing you to modify the distribution of the received amount across one or more Proforma Invoices.
- If any amount remains undistributed after allocation to the Proforma Invoices, it is automatically recorded as an Advance Payment.
note
If there are no pending Proforma Invoices then distributed table is not visible and you can add the entire amount to advance amount.
- Click the Submit button. The following screen appears:
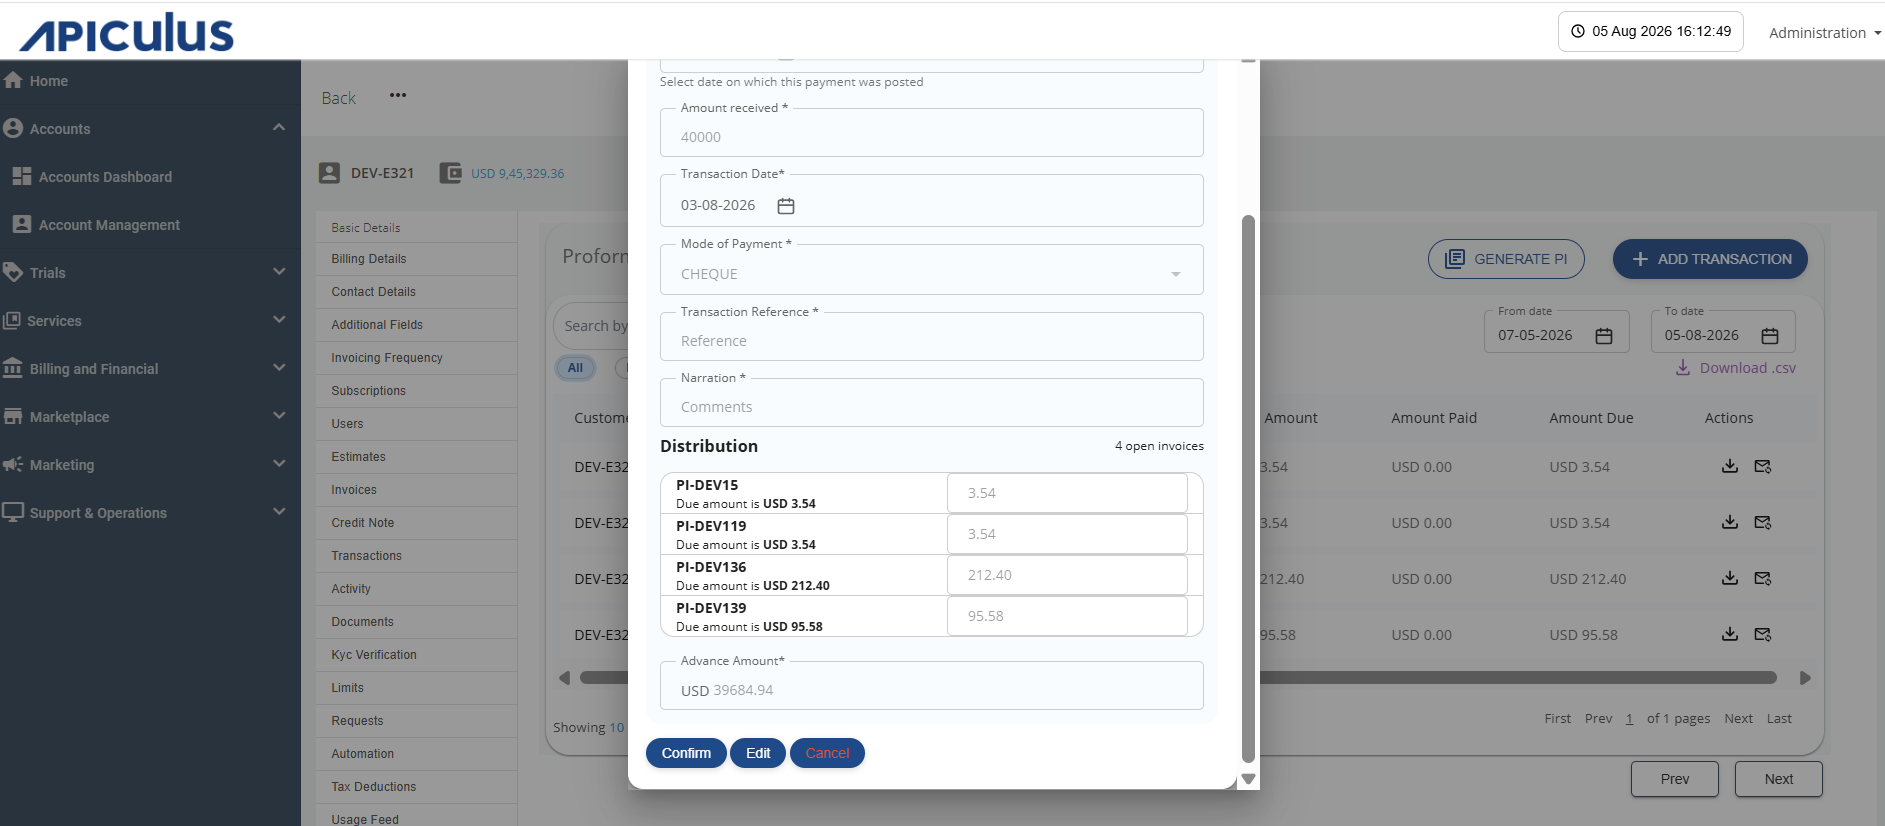
- Click the Confirm button.
The transaction is added successfully, and accordingly, the amount due column is updated for each respective Proforma Invoice.