Configuring Object Storage
Admins can configure the Object storage from the services section. To configure the Object Storage service, follow these steps:
-
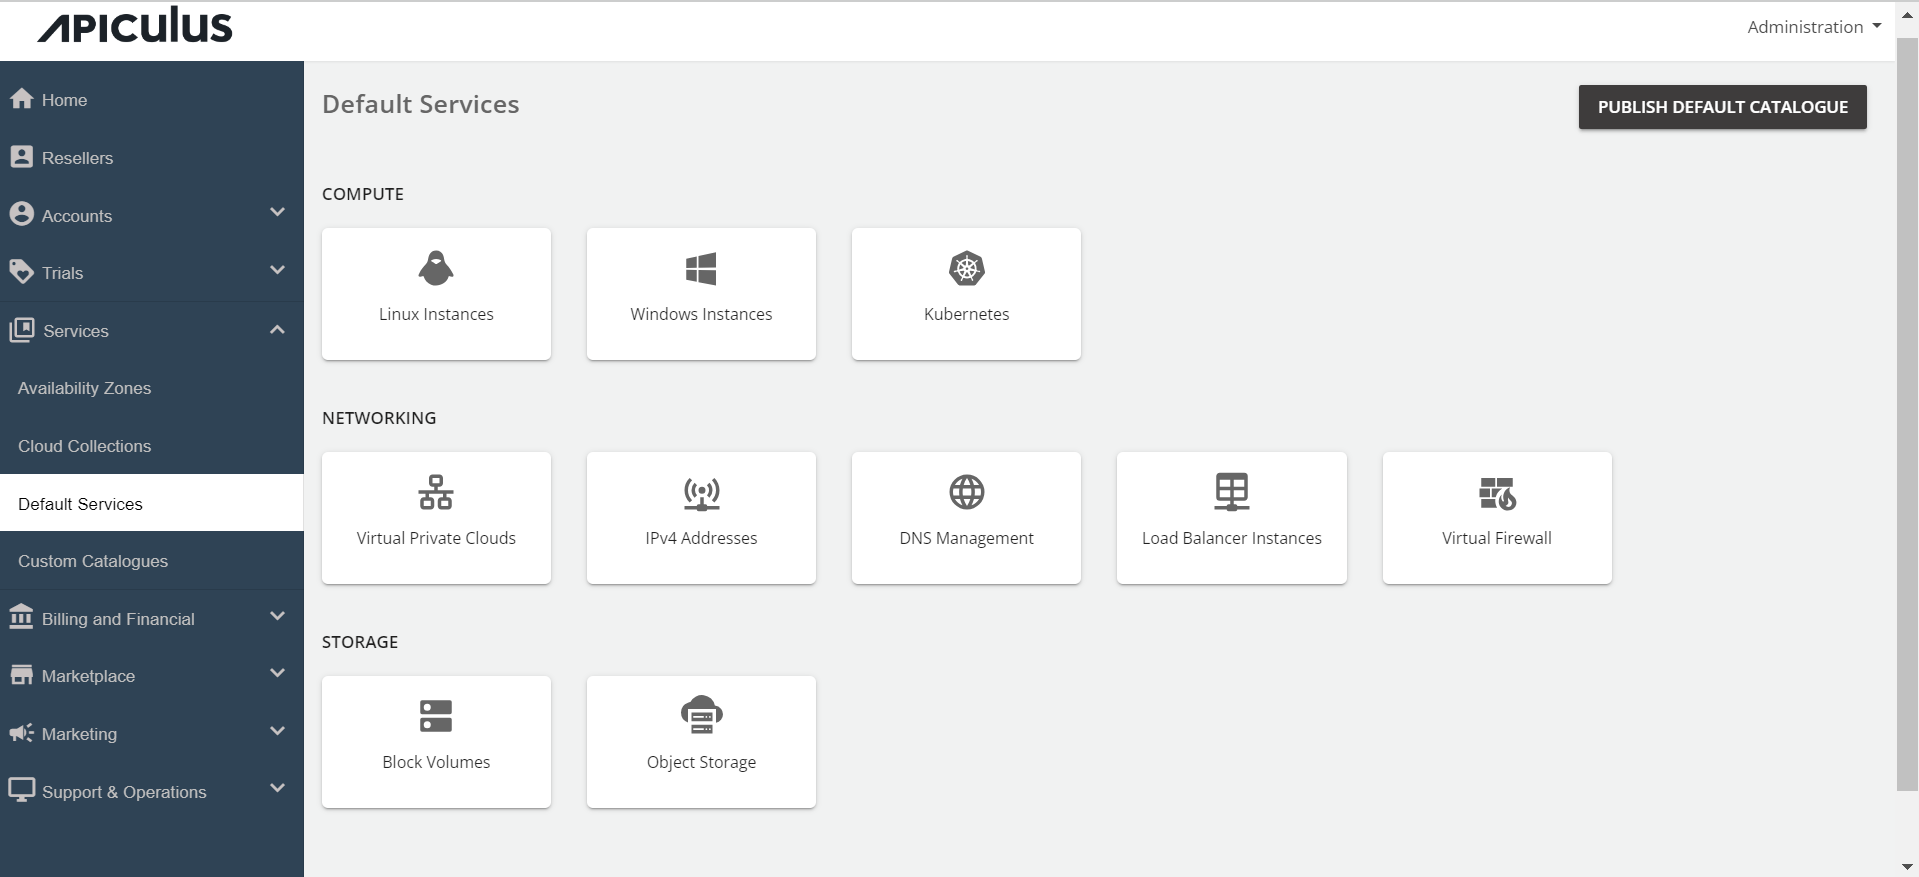
Go to the Default Services in the primary navigation menu.
-
Select Object Storage under the Storage section.
-
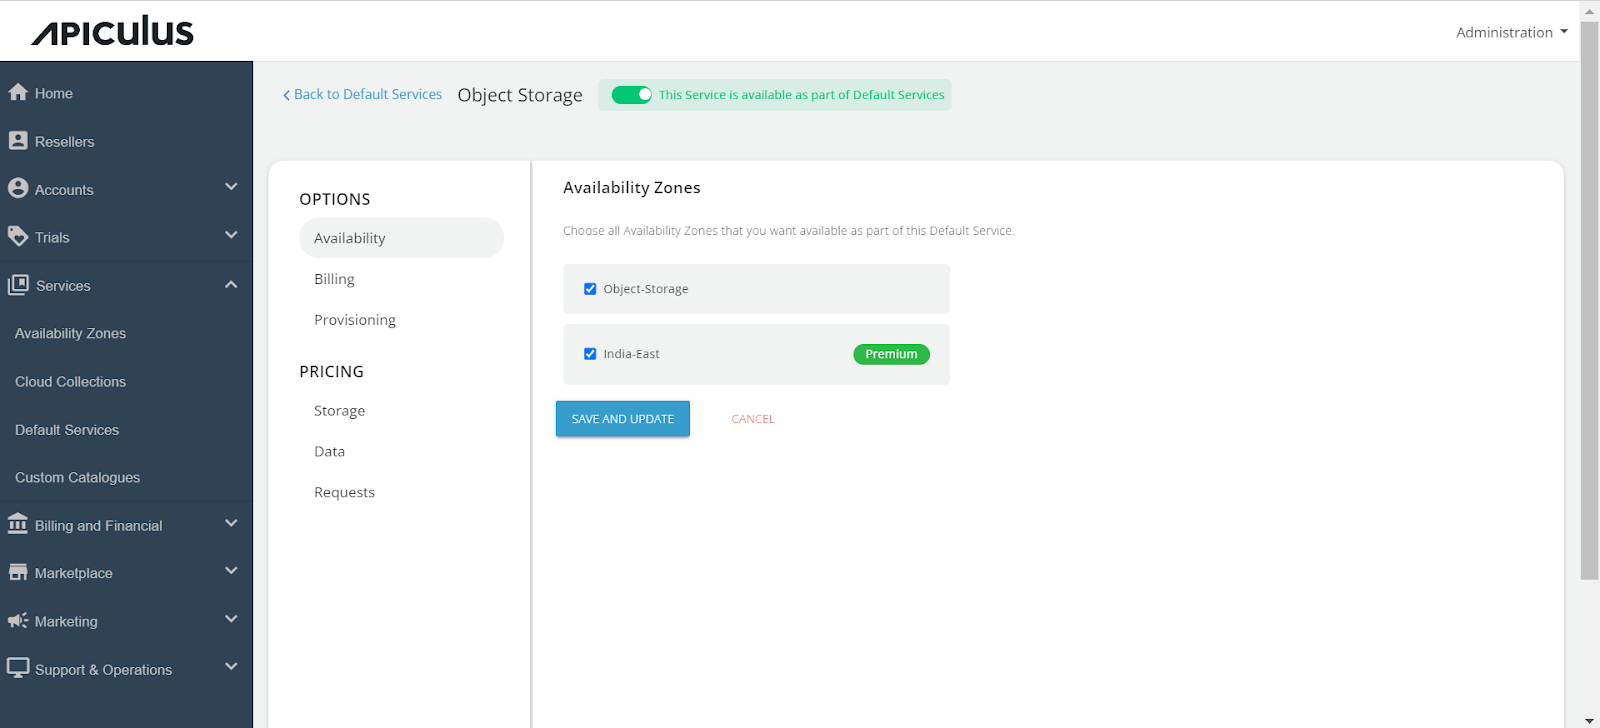
Enable the switch present at the top, i.e. This service is available as part of default services. All the sections will be enabled.
-
Go to the Availability section. Select the availability zones where you want to offer the service. Then, click on Save & Update.
-
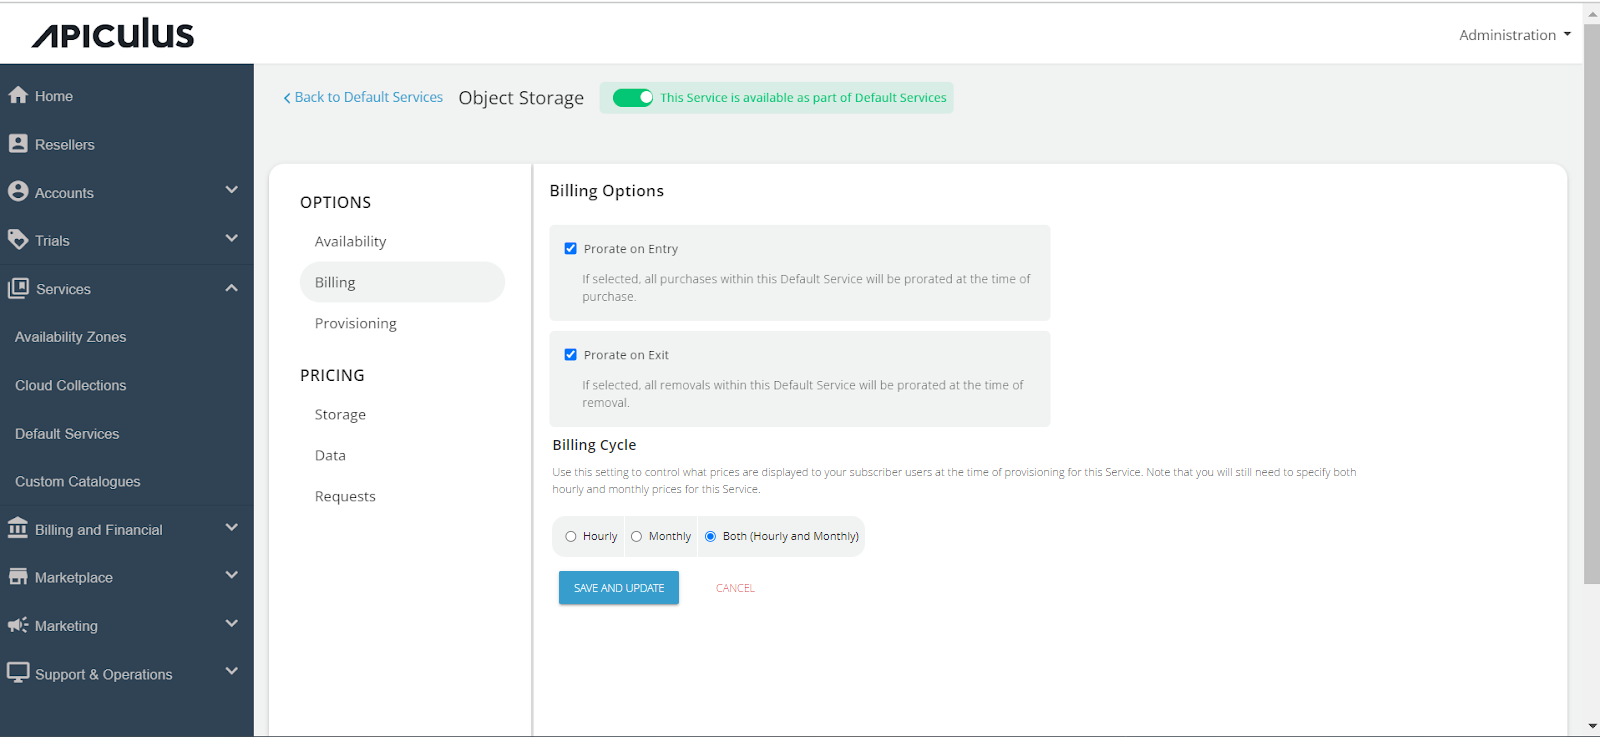
Under the Billing section, select the Billing Options.
- Prorate on Entry: Purchases will be pro-rated at the time of purchase of services.
- Prorate on Exit: Removals will be pro-rated at the time of removal of services.
-
Select the Billing Cycle to be displayed to the subscribers: Hourly, Monthly, or Both.
-
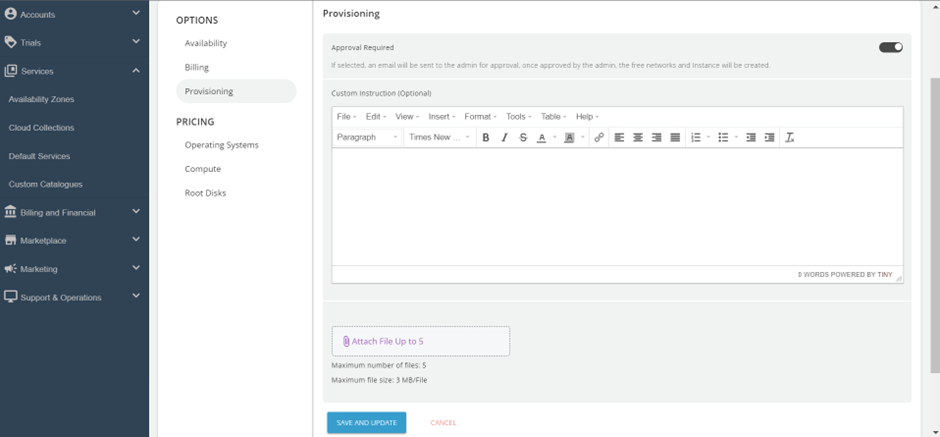
Click on the Provisioning section to offer the Object Storage service as approval-based. Enable the approval required switch. Enabling the switch, you will get two more options, i.e., Custom instructions that you want to send to the end user upon approval; you can also attach a maximum of 5 files up to 3 MB.
-
Click on the Storage under Pricing.
-
Click on the AZ, and specify the pricing in GB/hr.
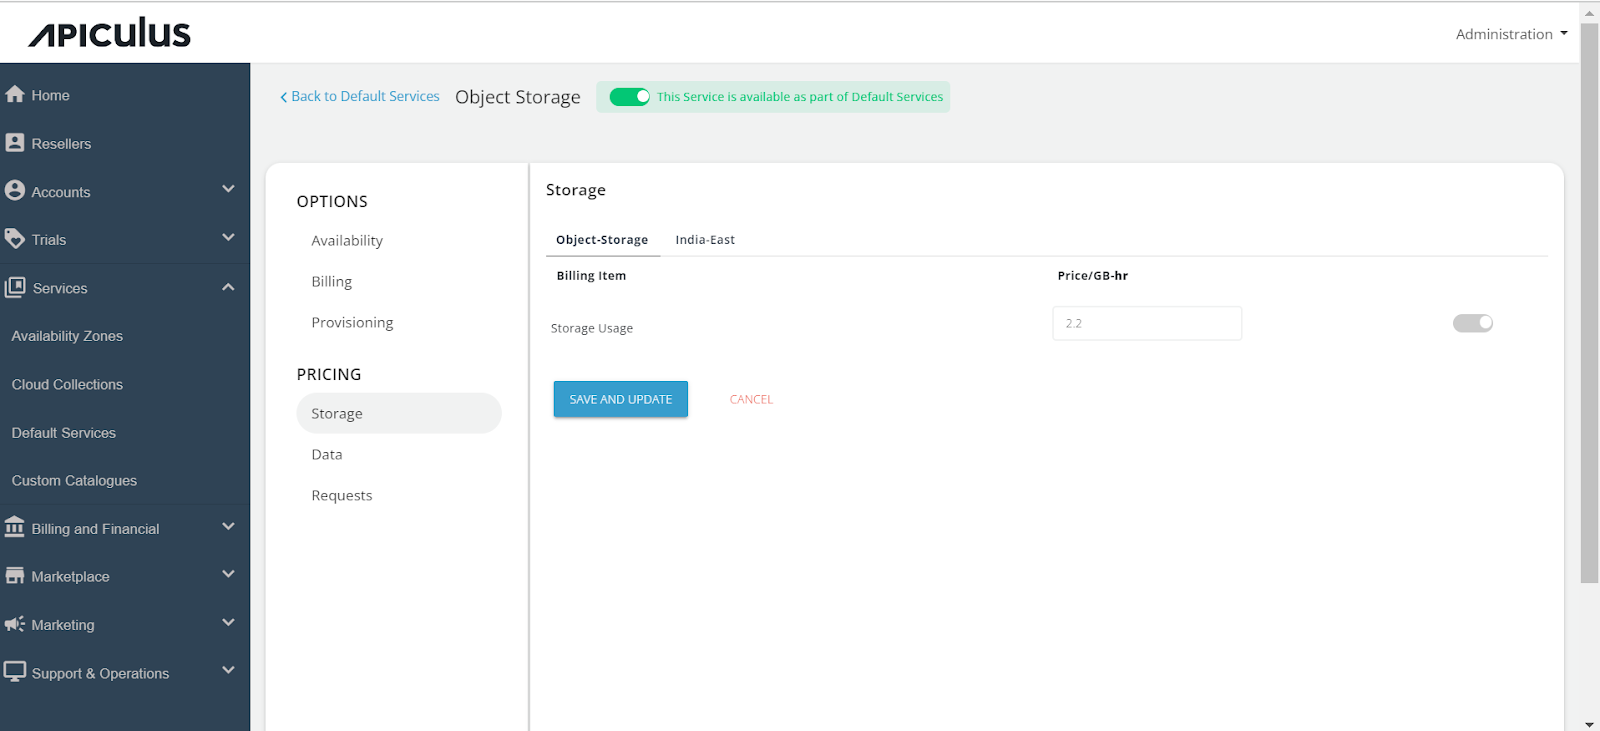
-
Click on the Data section, click on the Availability Zone, and specify the pricing in GB/hr for both Data Rate in and Data Rate out.
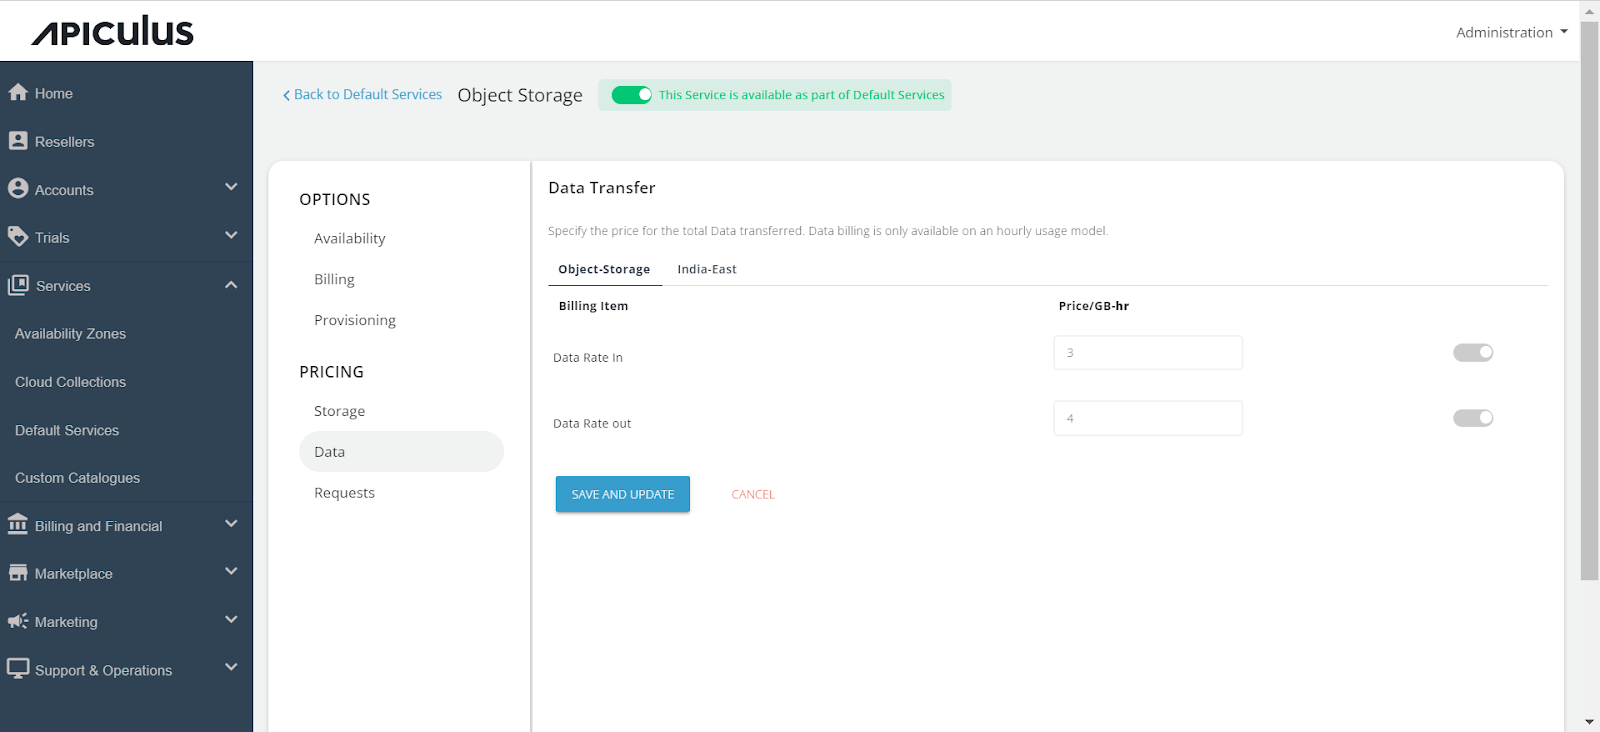
-
Click on the Requests section, select the availability zone, and specify the pricing for the following: a. HTTP requests GET/HEAD b. HTTP requests PUT/POST c. HTTP requests DELETE
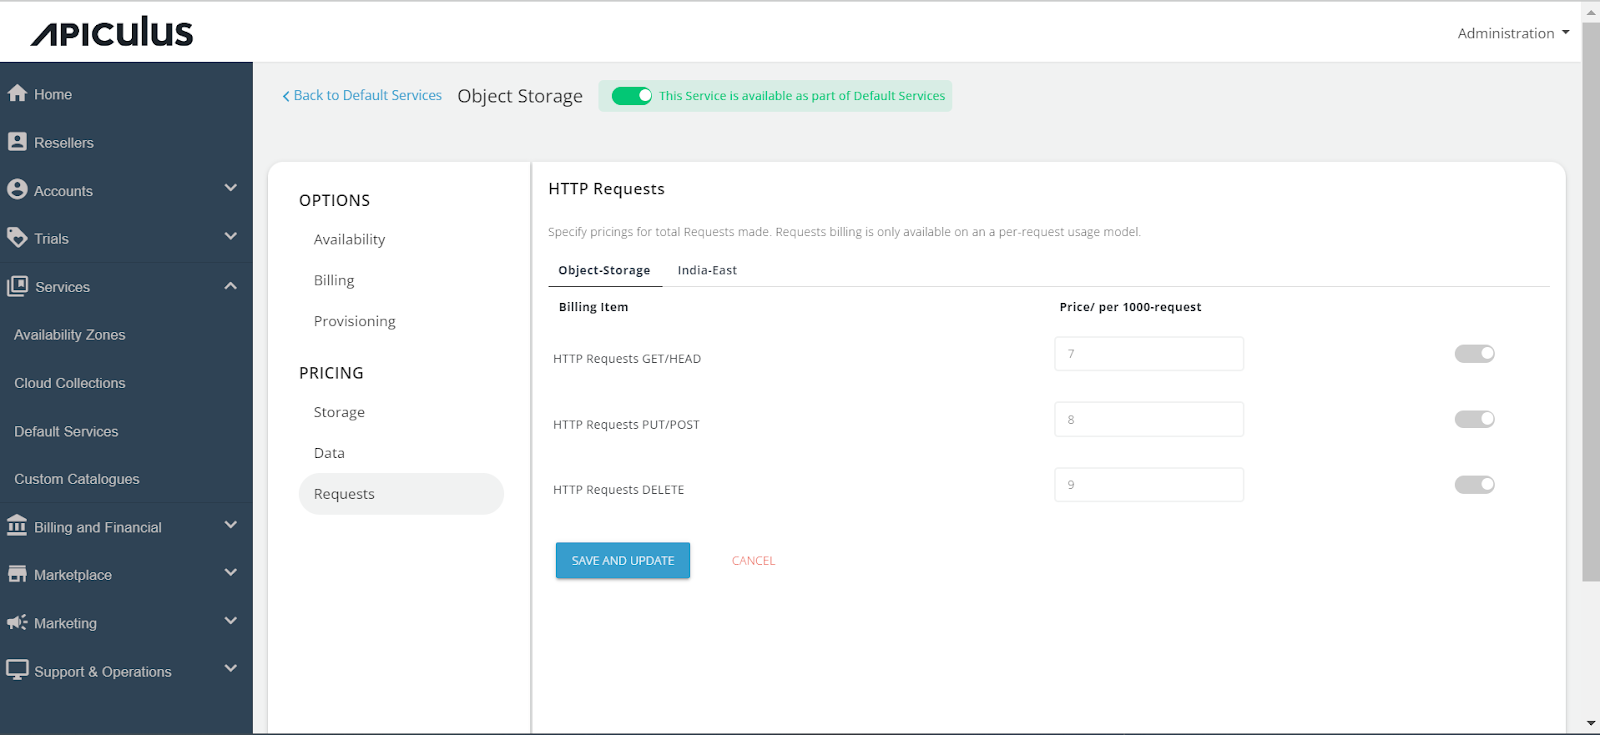 Return to the Default Services and click on PUBLISH DEFAULT CATALOGUE.