Creating a VPC
A Virtual Private Cloud (VPC) is a private virtual network that provides a secure environment for your cloud resources. It helps you organize and manage your network while controlling communication between resources.
To create a VPC, follow the below steps:
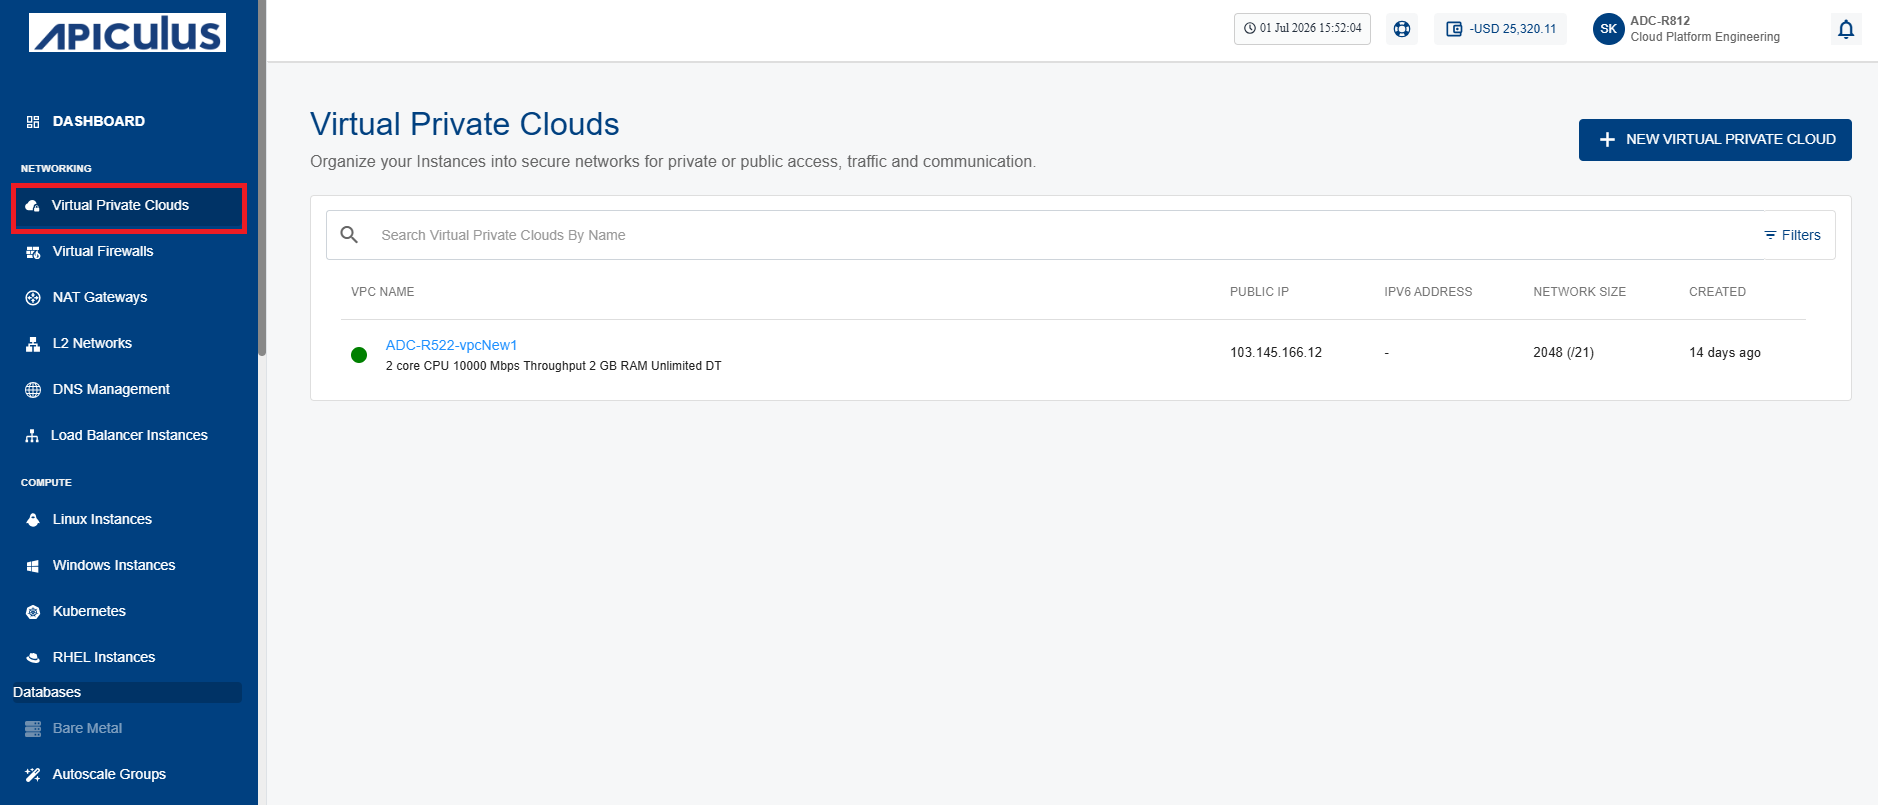
- Navigate to Networking > Virtual Private Clouds. The following screen appears:
- Click the New Virtual Private Cloud button. The following screen appears:
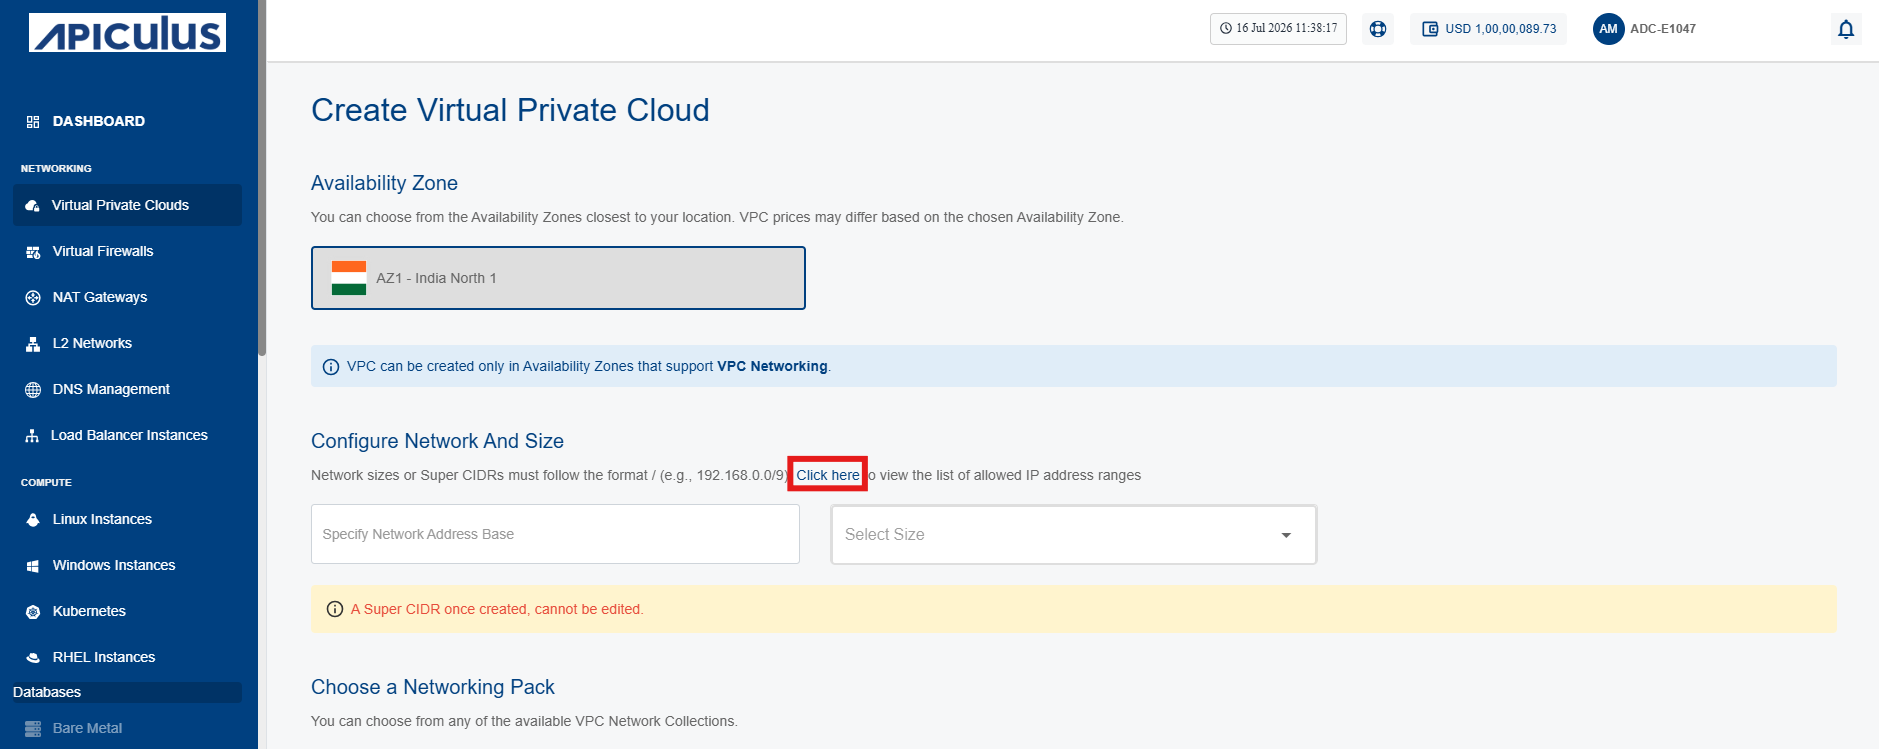
- Choose an Availability Zone, which is the geographical region where your VPC will be configured.
- Specify network address base size and select size i.e. The super CIDR for the internal IP allocation in an x.x.x.x/x format.
note
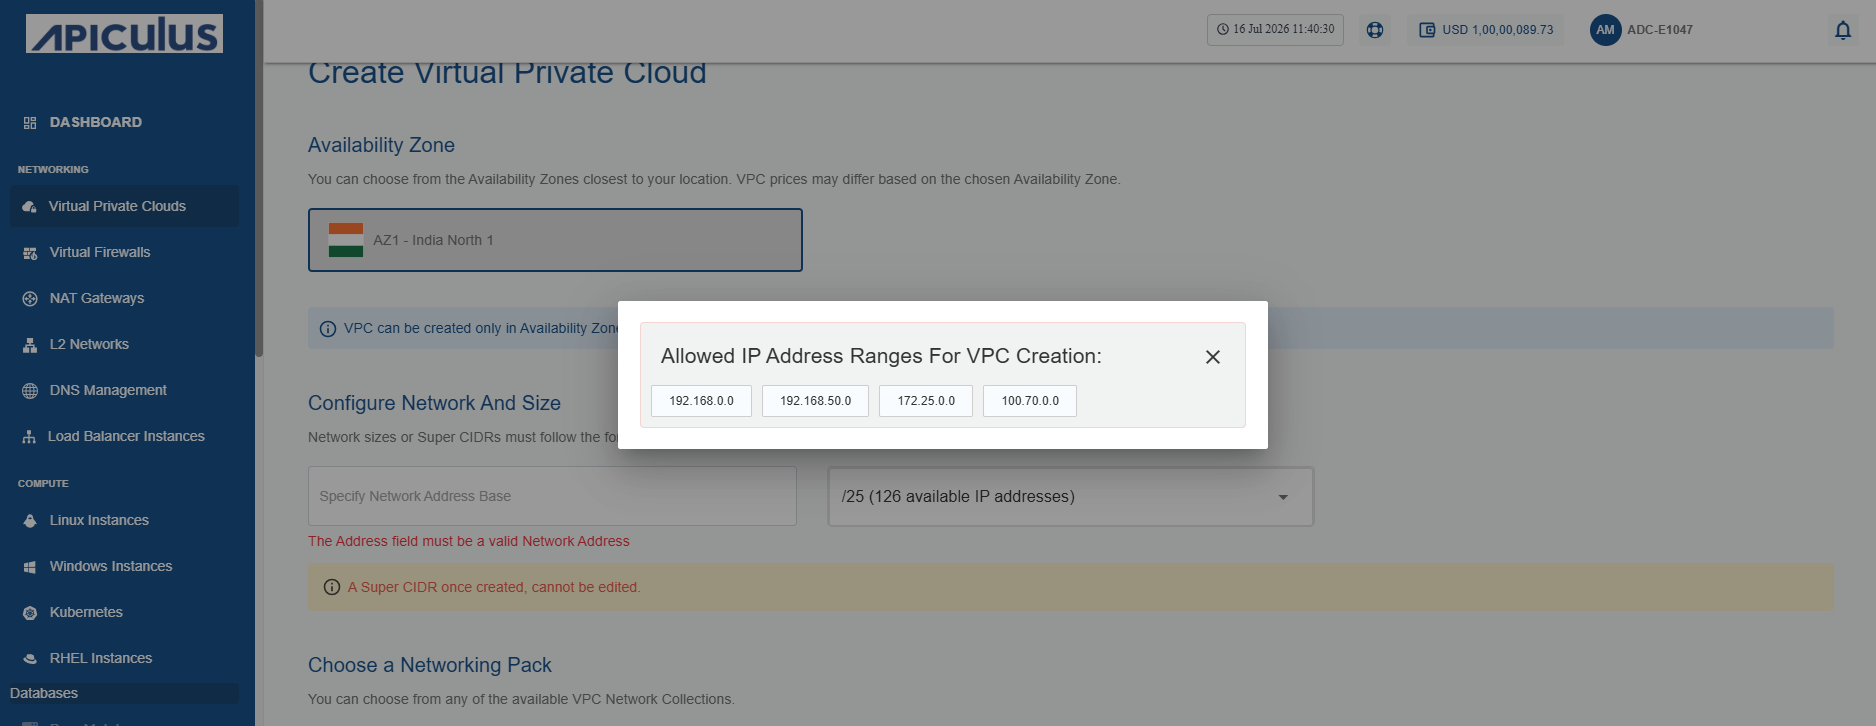
To know allowed IP address ranges for VPC creation, select the click here link (highlighted in red).
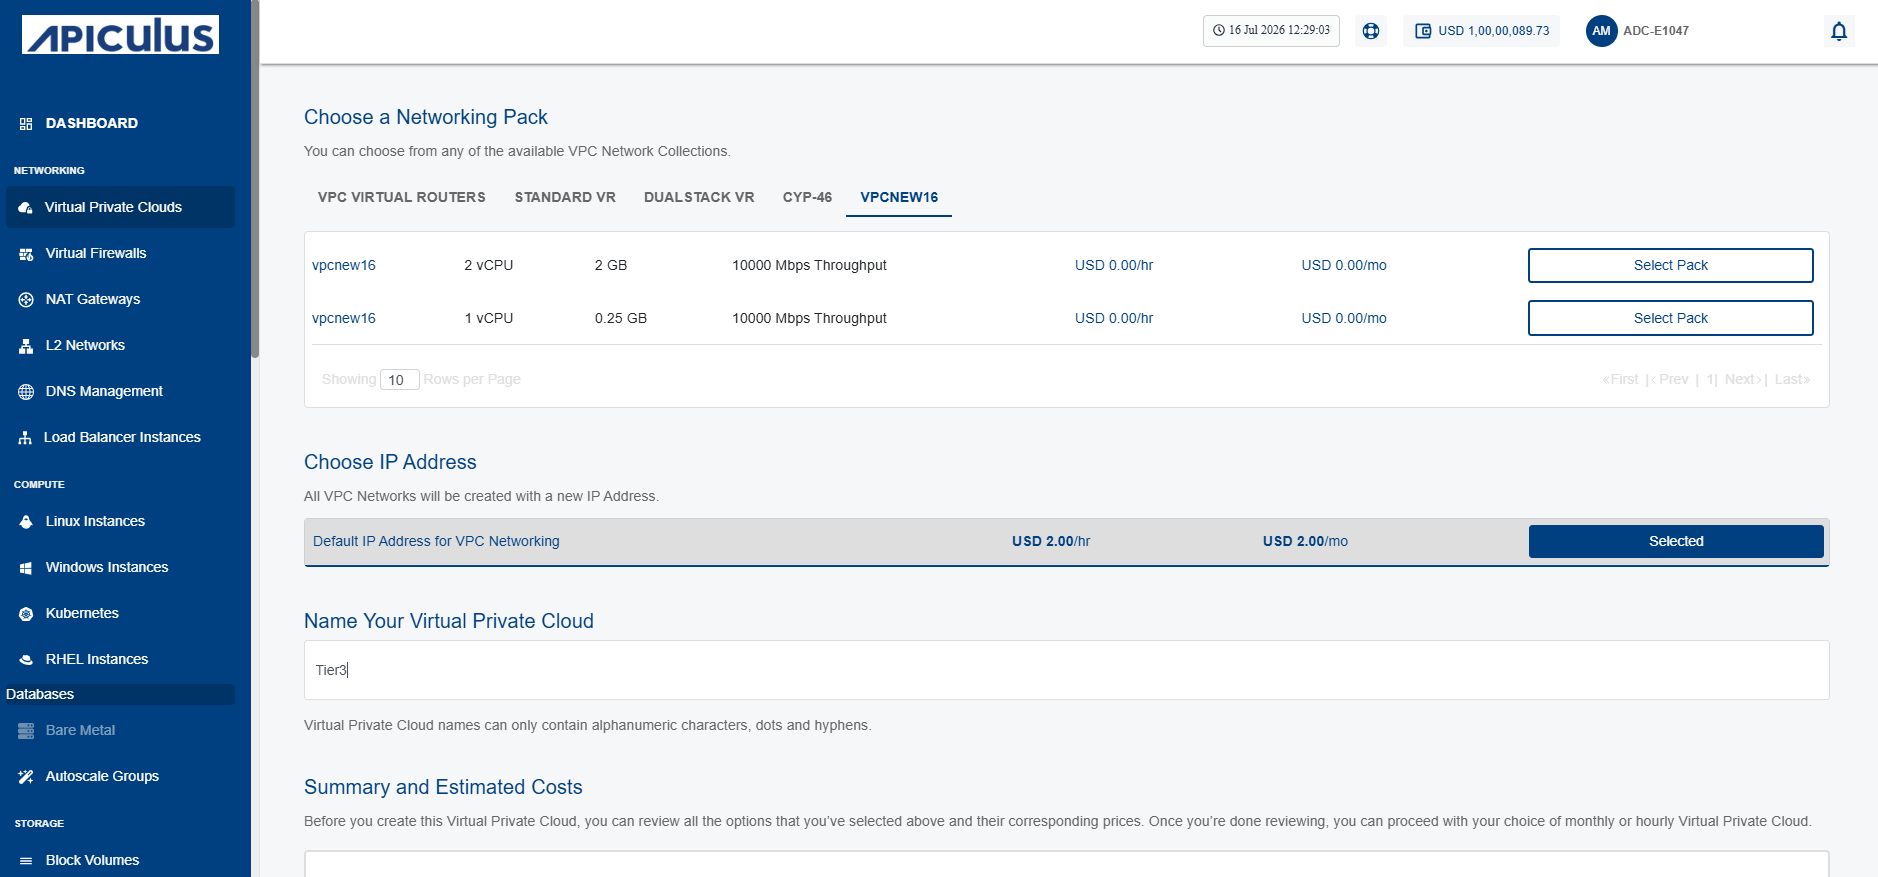
- Choose a Dual Stack VPC (IPv6 + IPv4) from the available networking pack.
note
To configure IPv6 under a VPC, you must create a ticket with our support team for assistance.
- To create the VPC with a new NICNET IP address, select Default IP Address for VPC Networking.
- Enter the valid name in the Name your Virtual Private Cloud field.
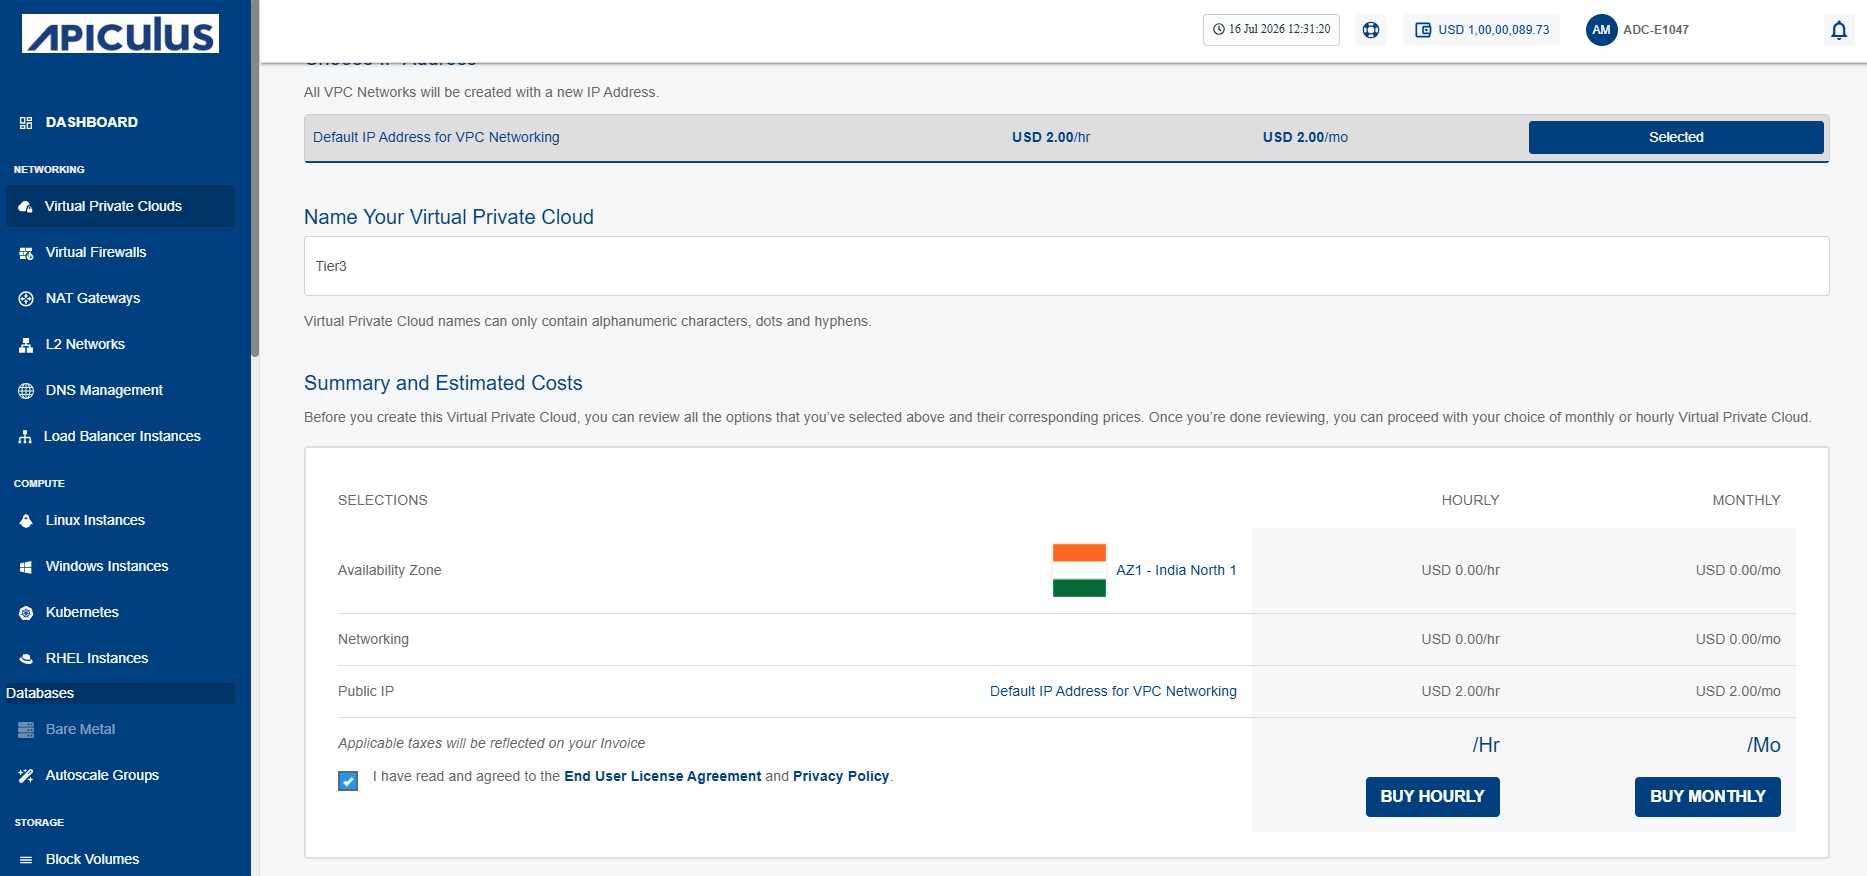
- Verify the Summary and Estimated Costs section (Here, both the hourly and monthly price summaries are displayed).
- Select the I have read and agreed to the End User License Agreement and Privacy Policy option.
- To display the price summary, click the Buy Hourly or Buy Monthly button, a confirmation screen appears:
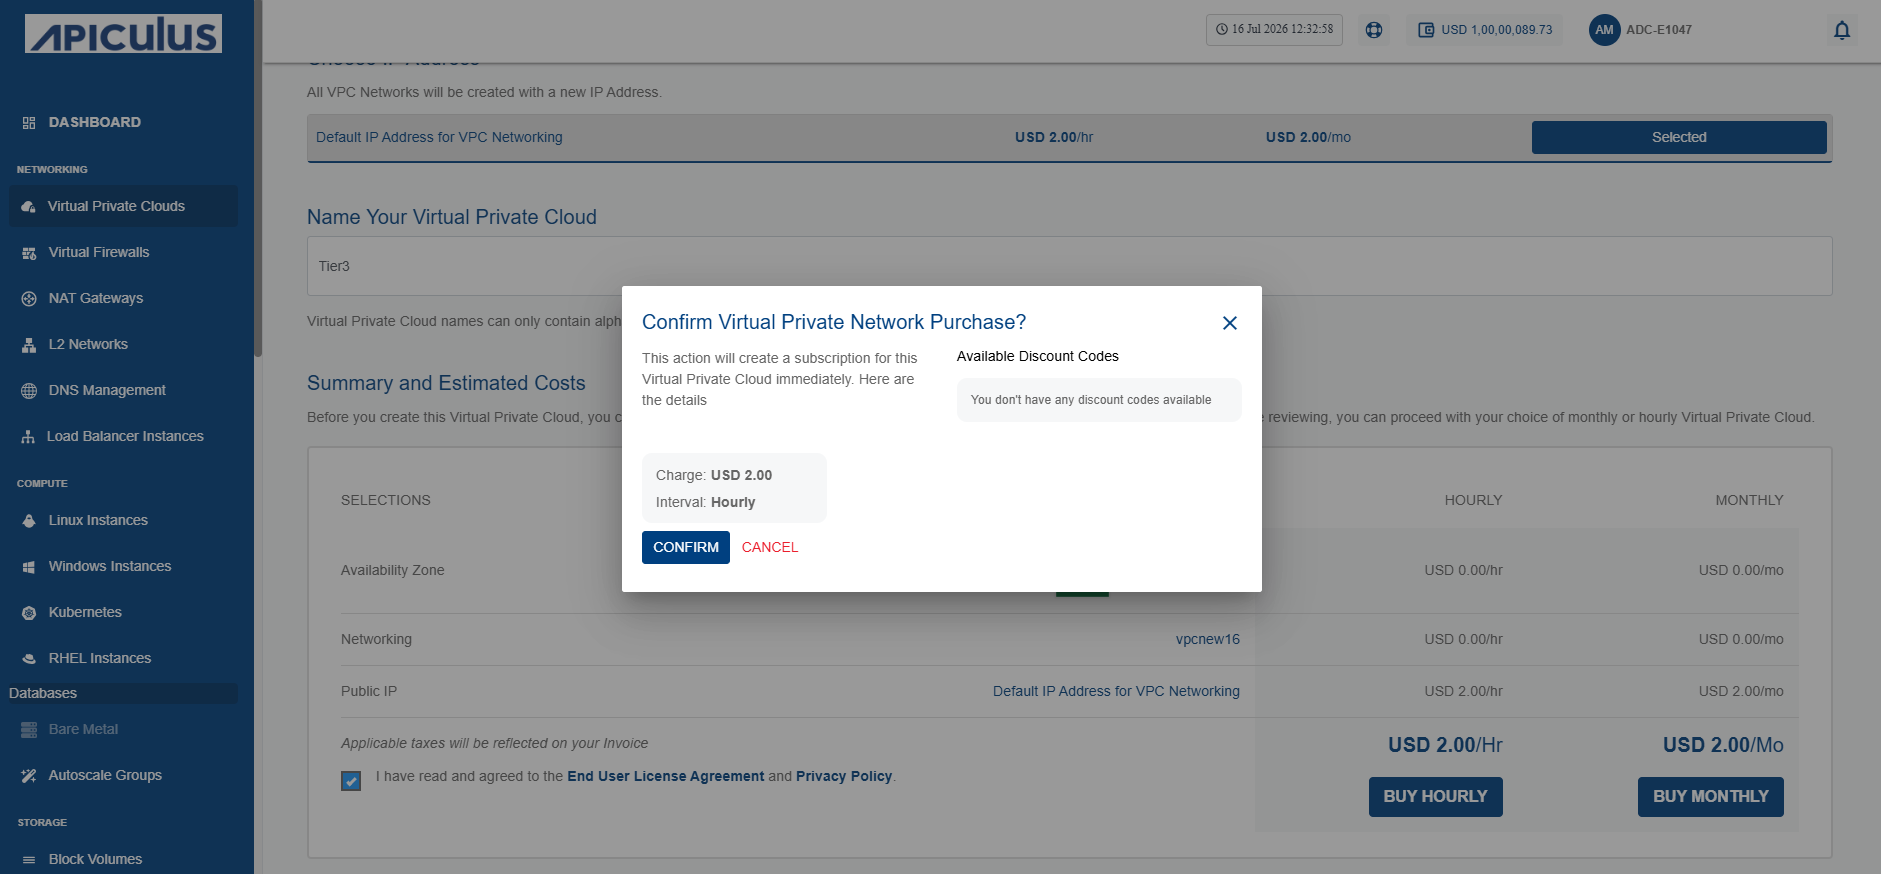
- Click Confirm.
Once ready, you get the notification of this purchase on your email address on record.