Enabling Instance Protection
The Instance Protection service can be enabled in two ways:
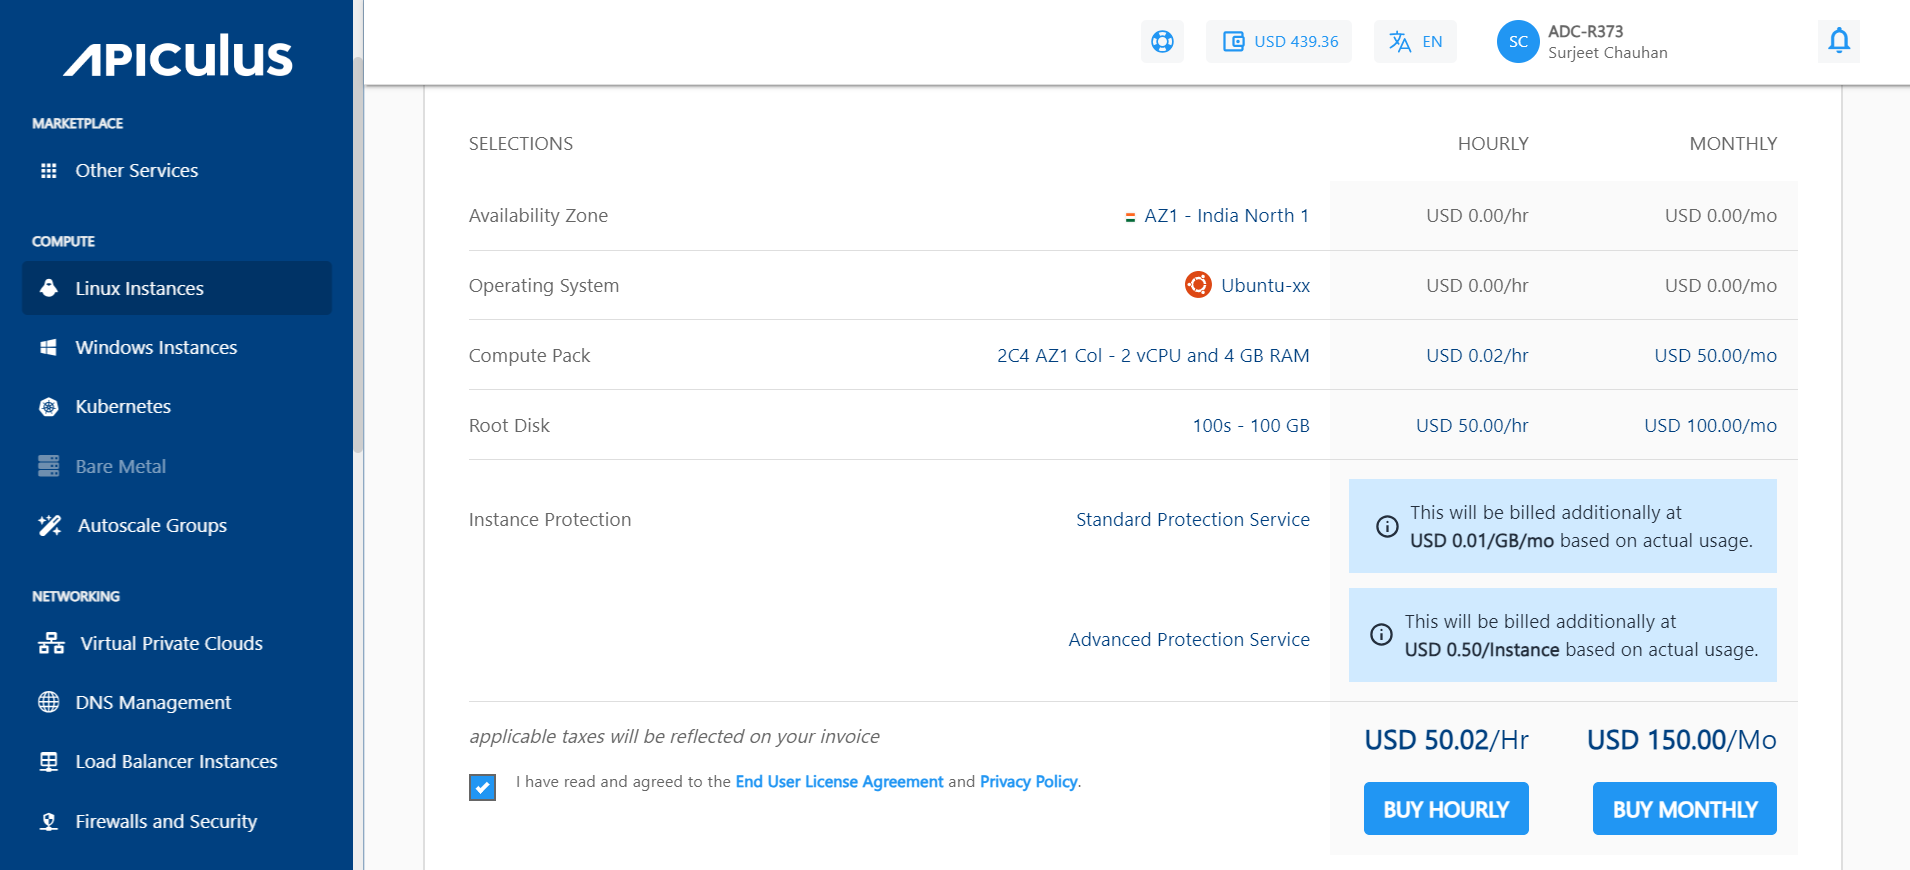
During Instance Creation
To enable protection while creating a Linux or a Windows instance, follow these steps:
- Enable the Protect this Instance switch. There, you will get a Standard Protection Service, and you can also opt for Advance Protection Features.
 2. The pricing summary will be updated based on your selection.
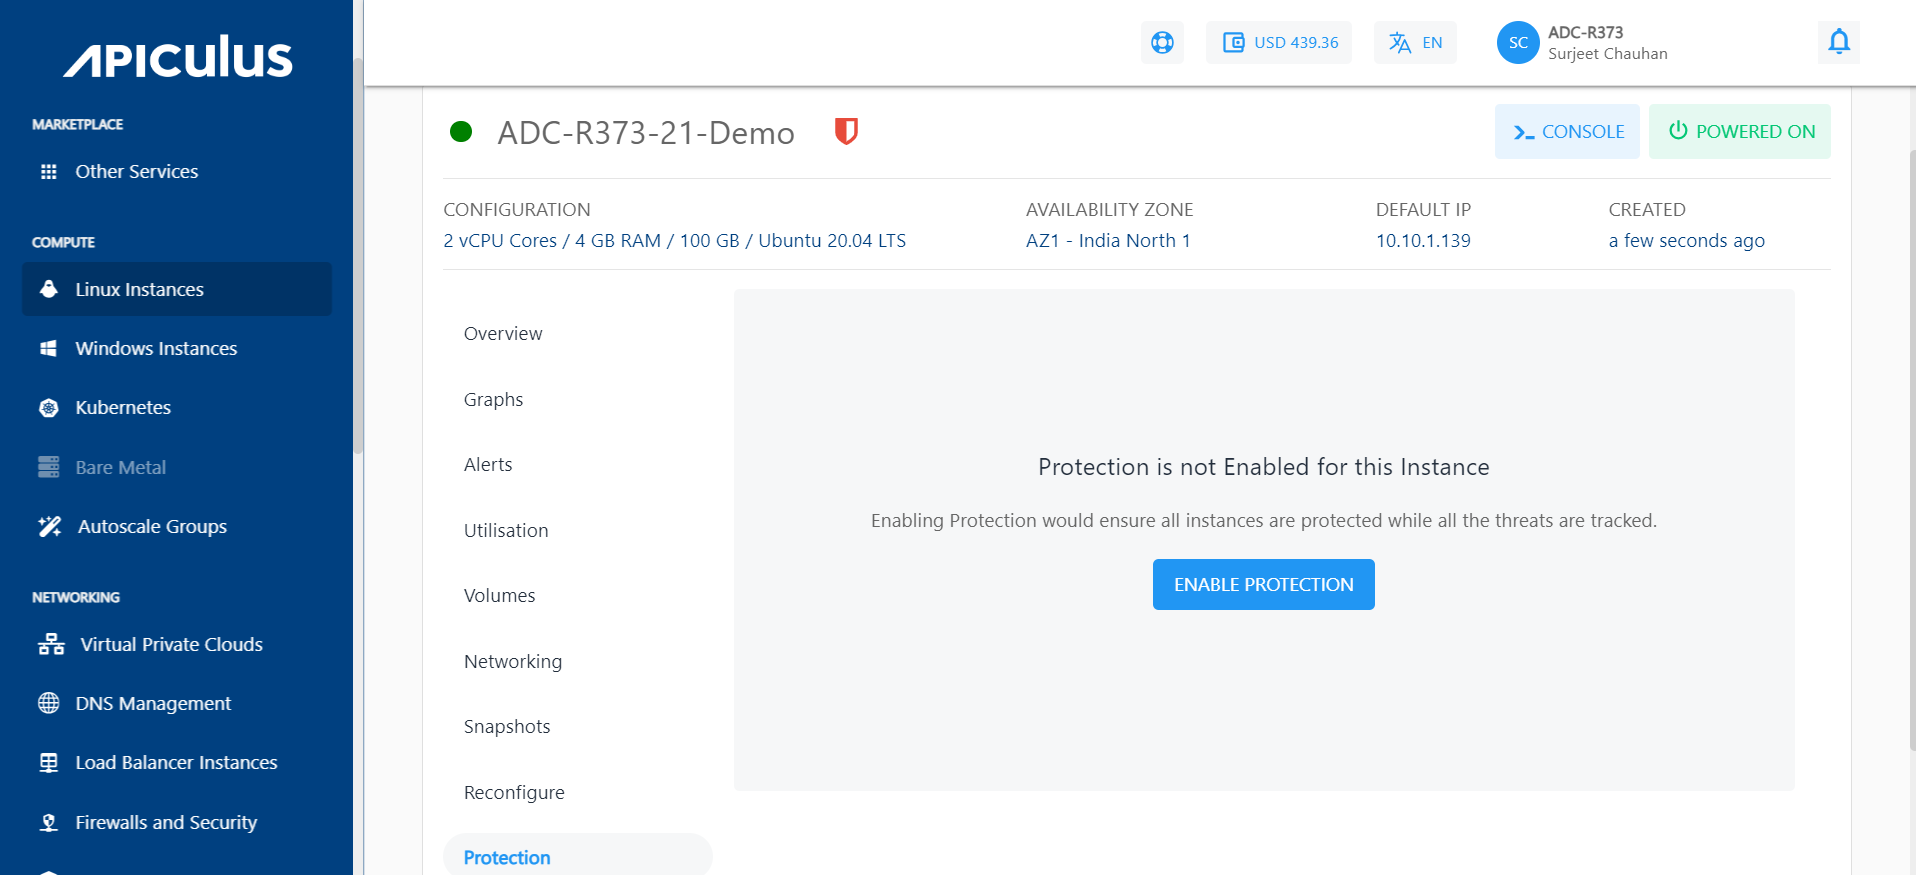
After Instance Creation
If you already have a Linux or Windows Instance and didn't enable the protection service while creating the instance, you can activate it later. Navigate to the Listing of the Linux/Windows Instances. Click the particular instance.
To enable the protection plan service, follow these steps:
- Navigate to the instance listing, select the Protection section and click the ENABLE PROTECTION button.
- Click Confirm, and if you want to enable the advanced protection features, then enable the switch as shown in the below screenshot:
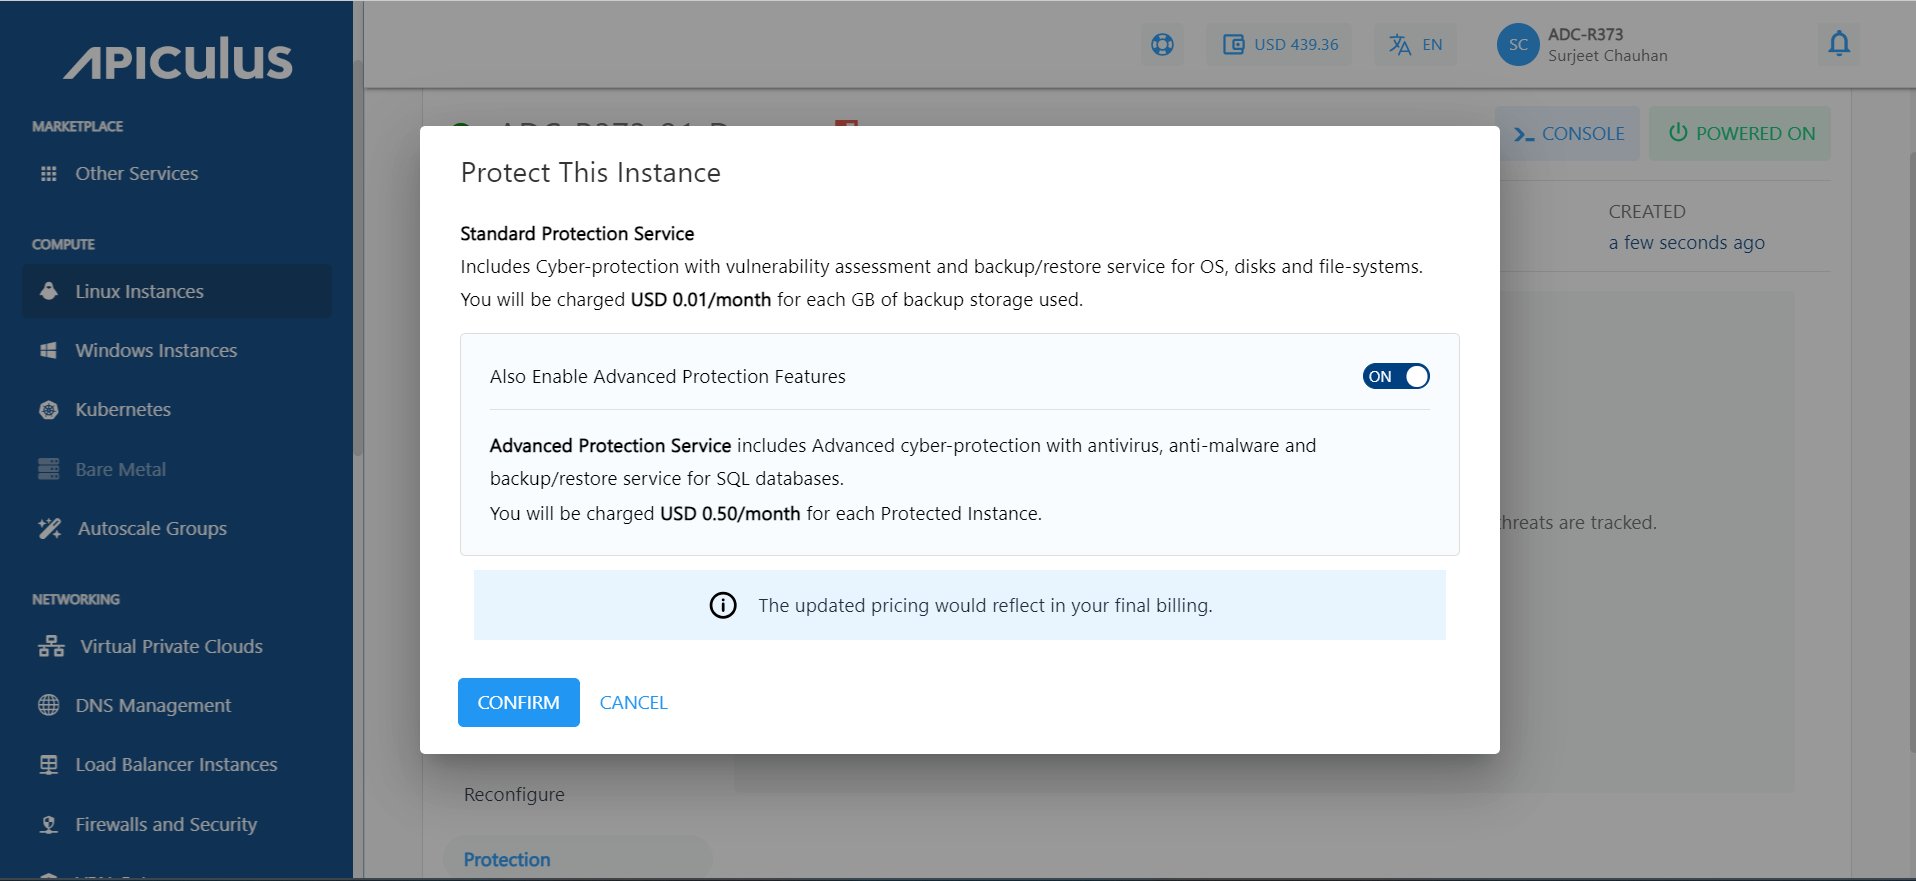 3. After the confirmation, the steps for the activation will be listed, and these steps need to be run through the command line.note
When a user enables the Advance Plan, it works in addition to the Standard Plan. The pricing is calculated based on per GB/usage basis for Standard Plan features and per instance/per workload for Advance plan features.
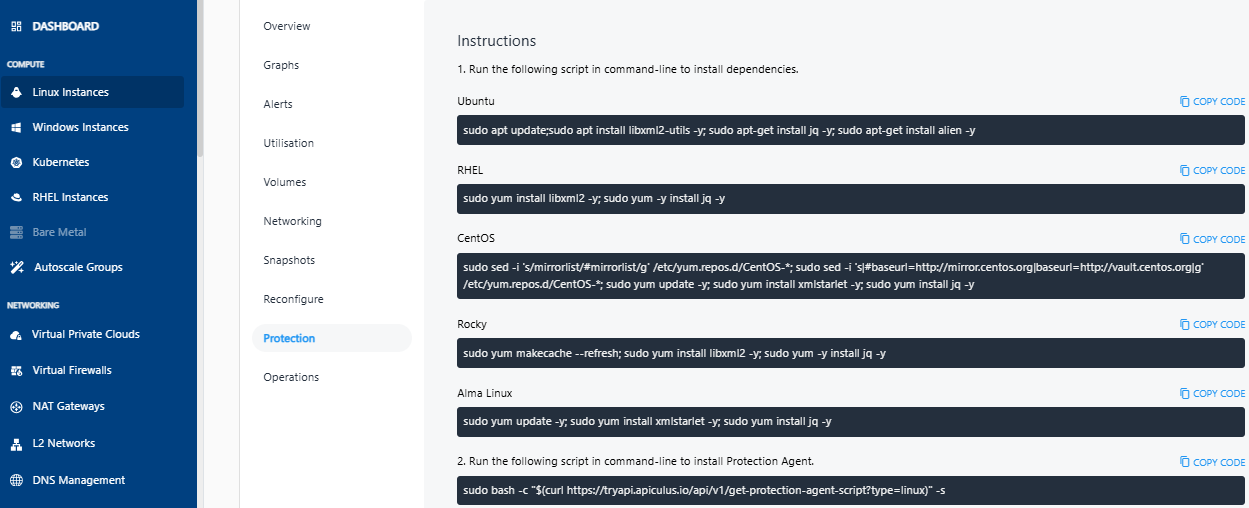 4. Run the respective script (mentioned under Point No. 1 in above screen) in the command-line to install dependencies.
5. Run the respective script (mentioned under Point No. 2 in above screen) in command-line to install the Protection Agent.
note
The list of Supported Operating systems and environments.