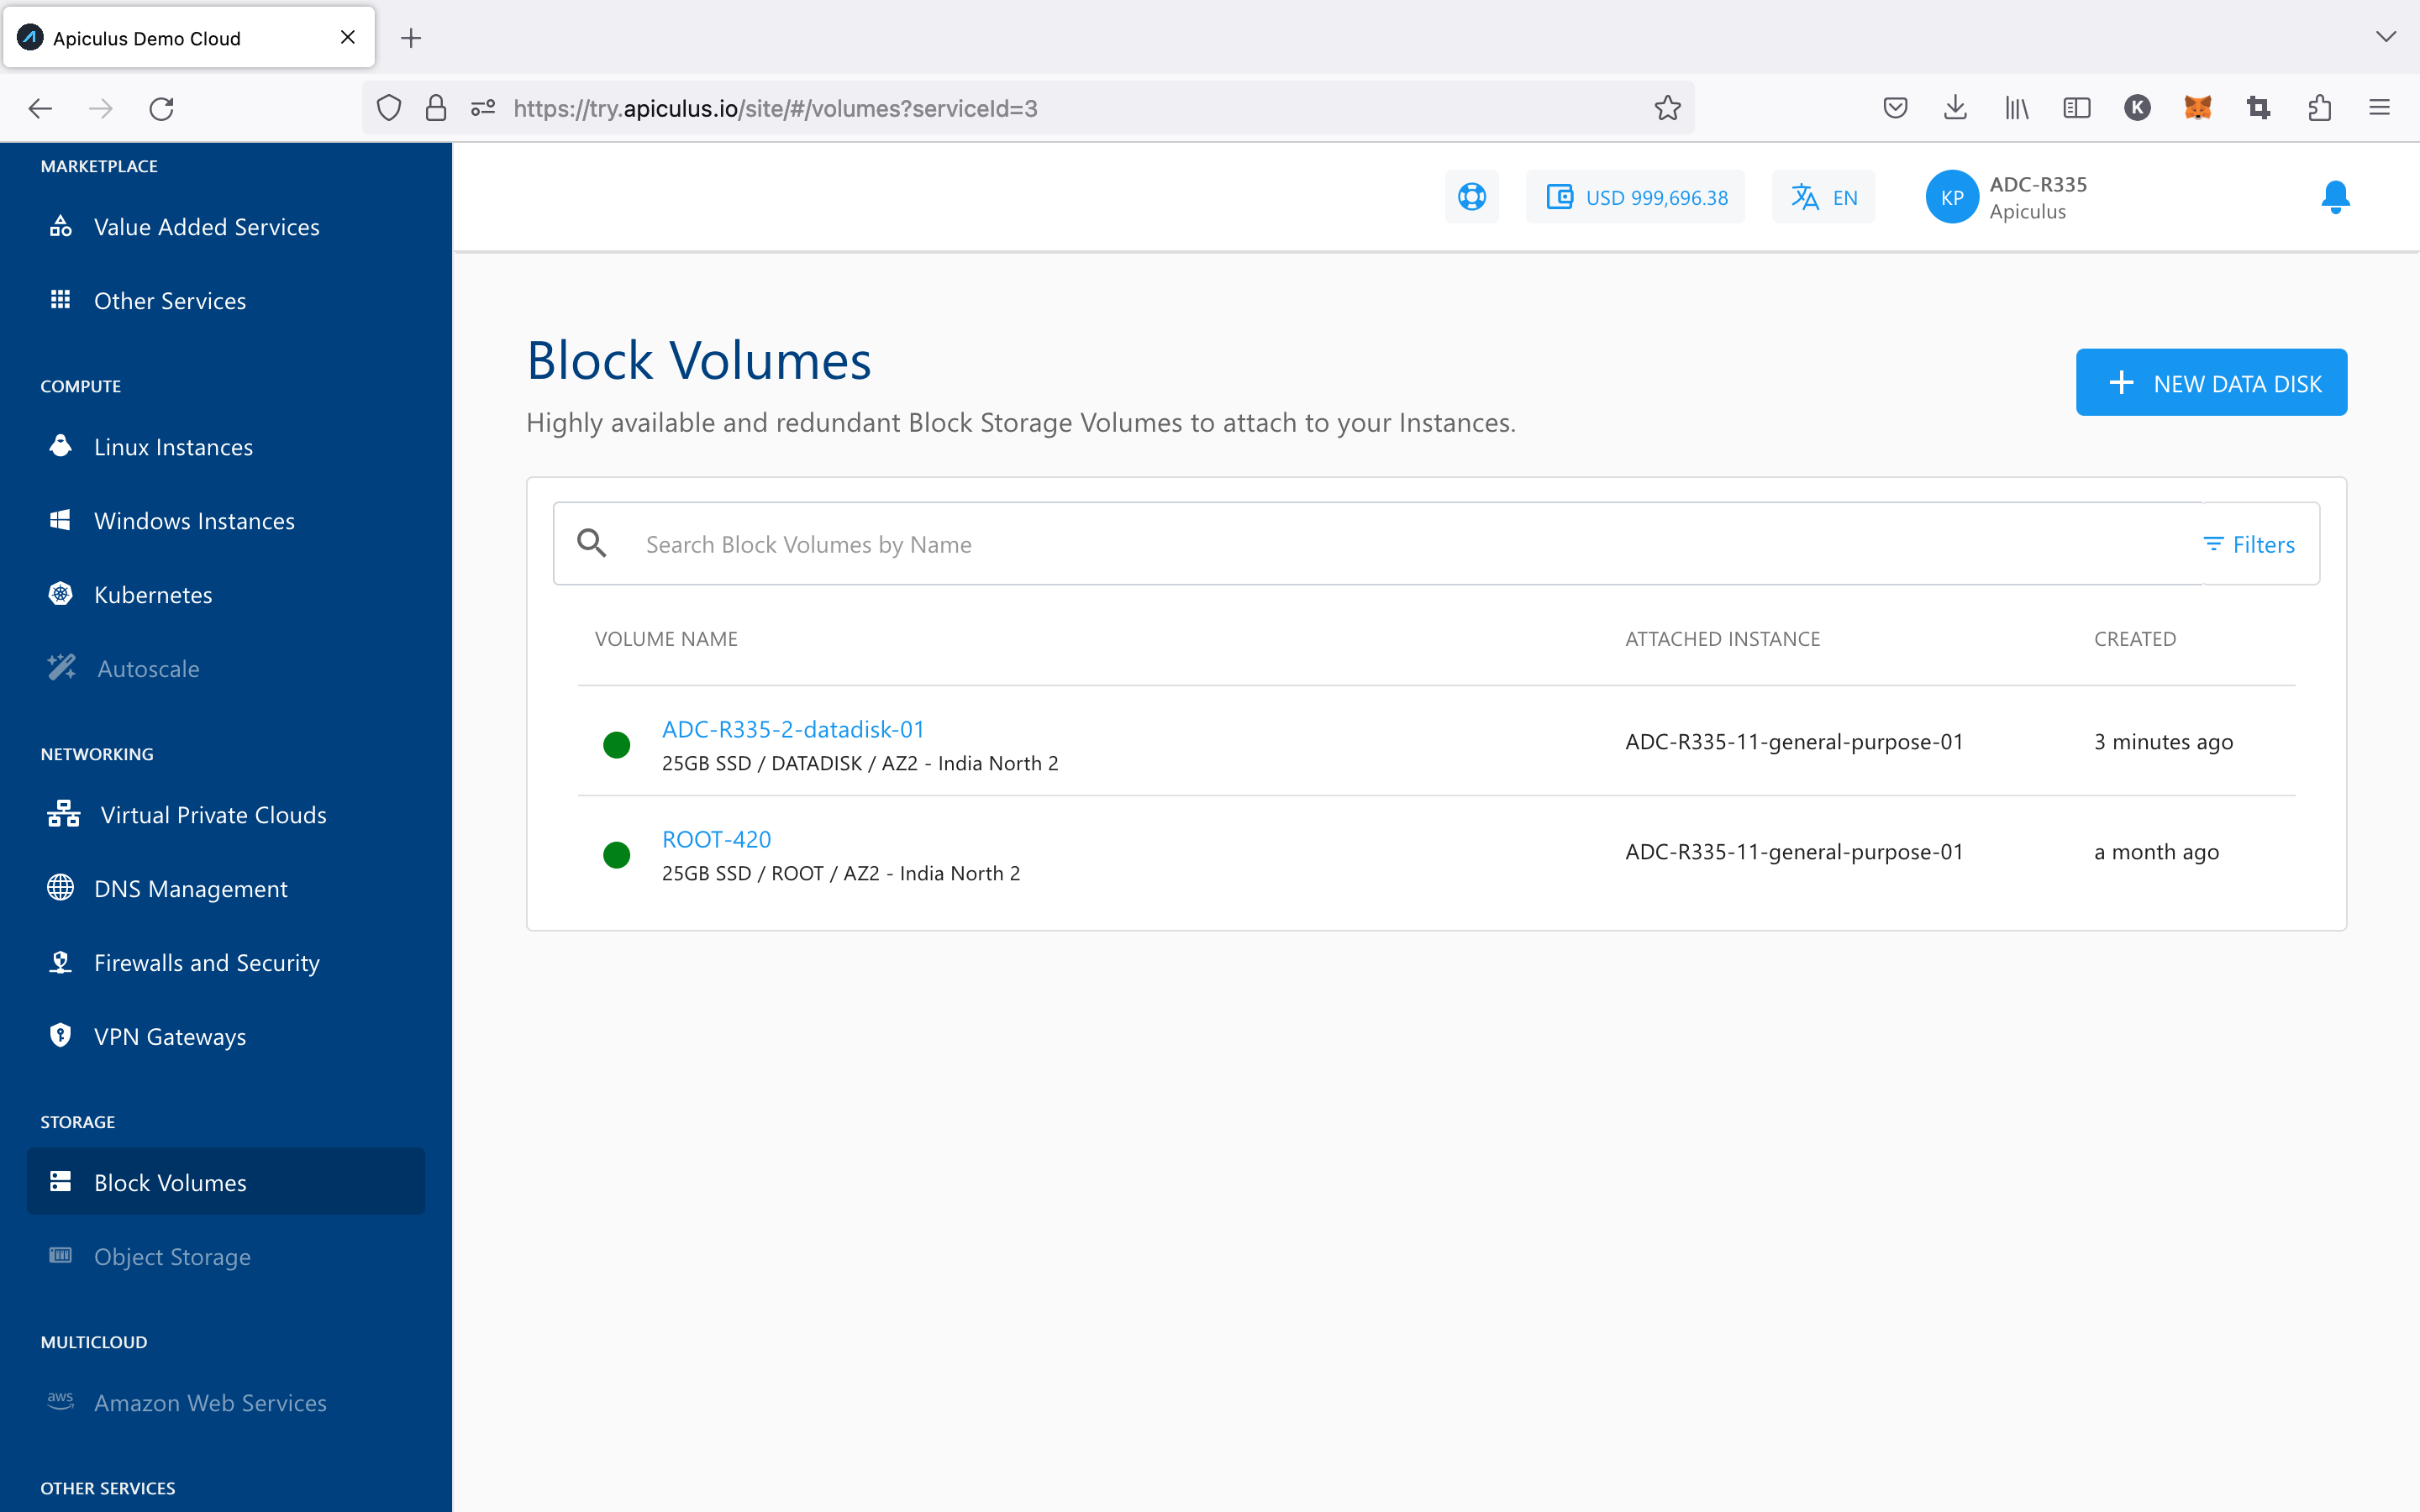
Creating Data Disk
To create a Block Volume data disk, follow the below steps:
- Navigate to Storage > Block Volumes.
- Click the NEW DATA DISK.
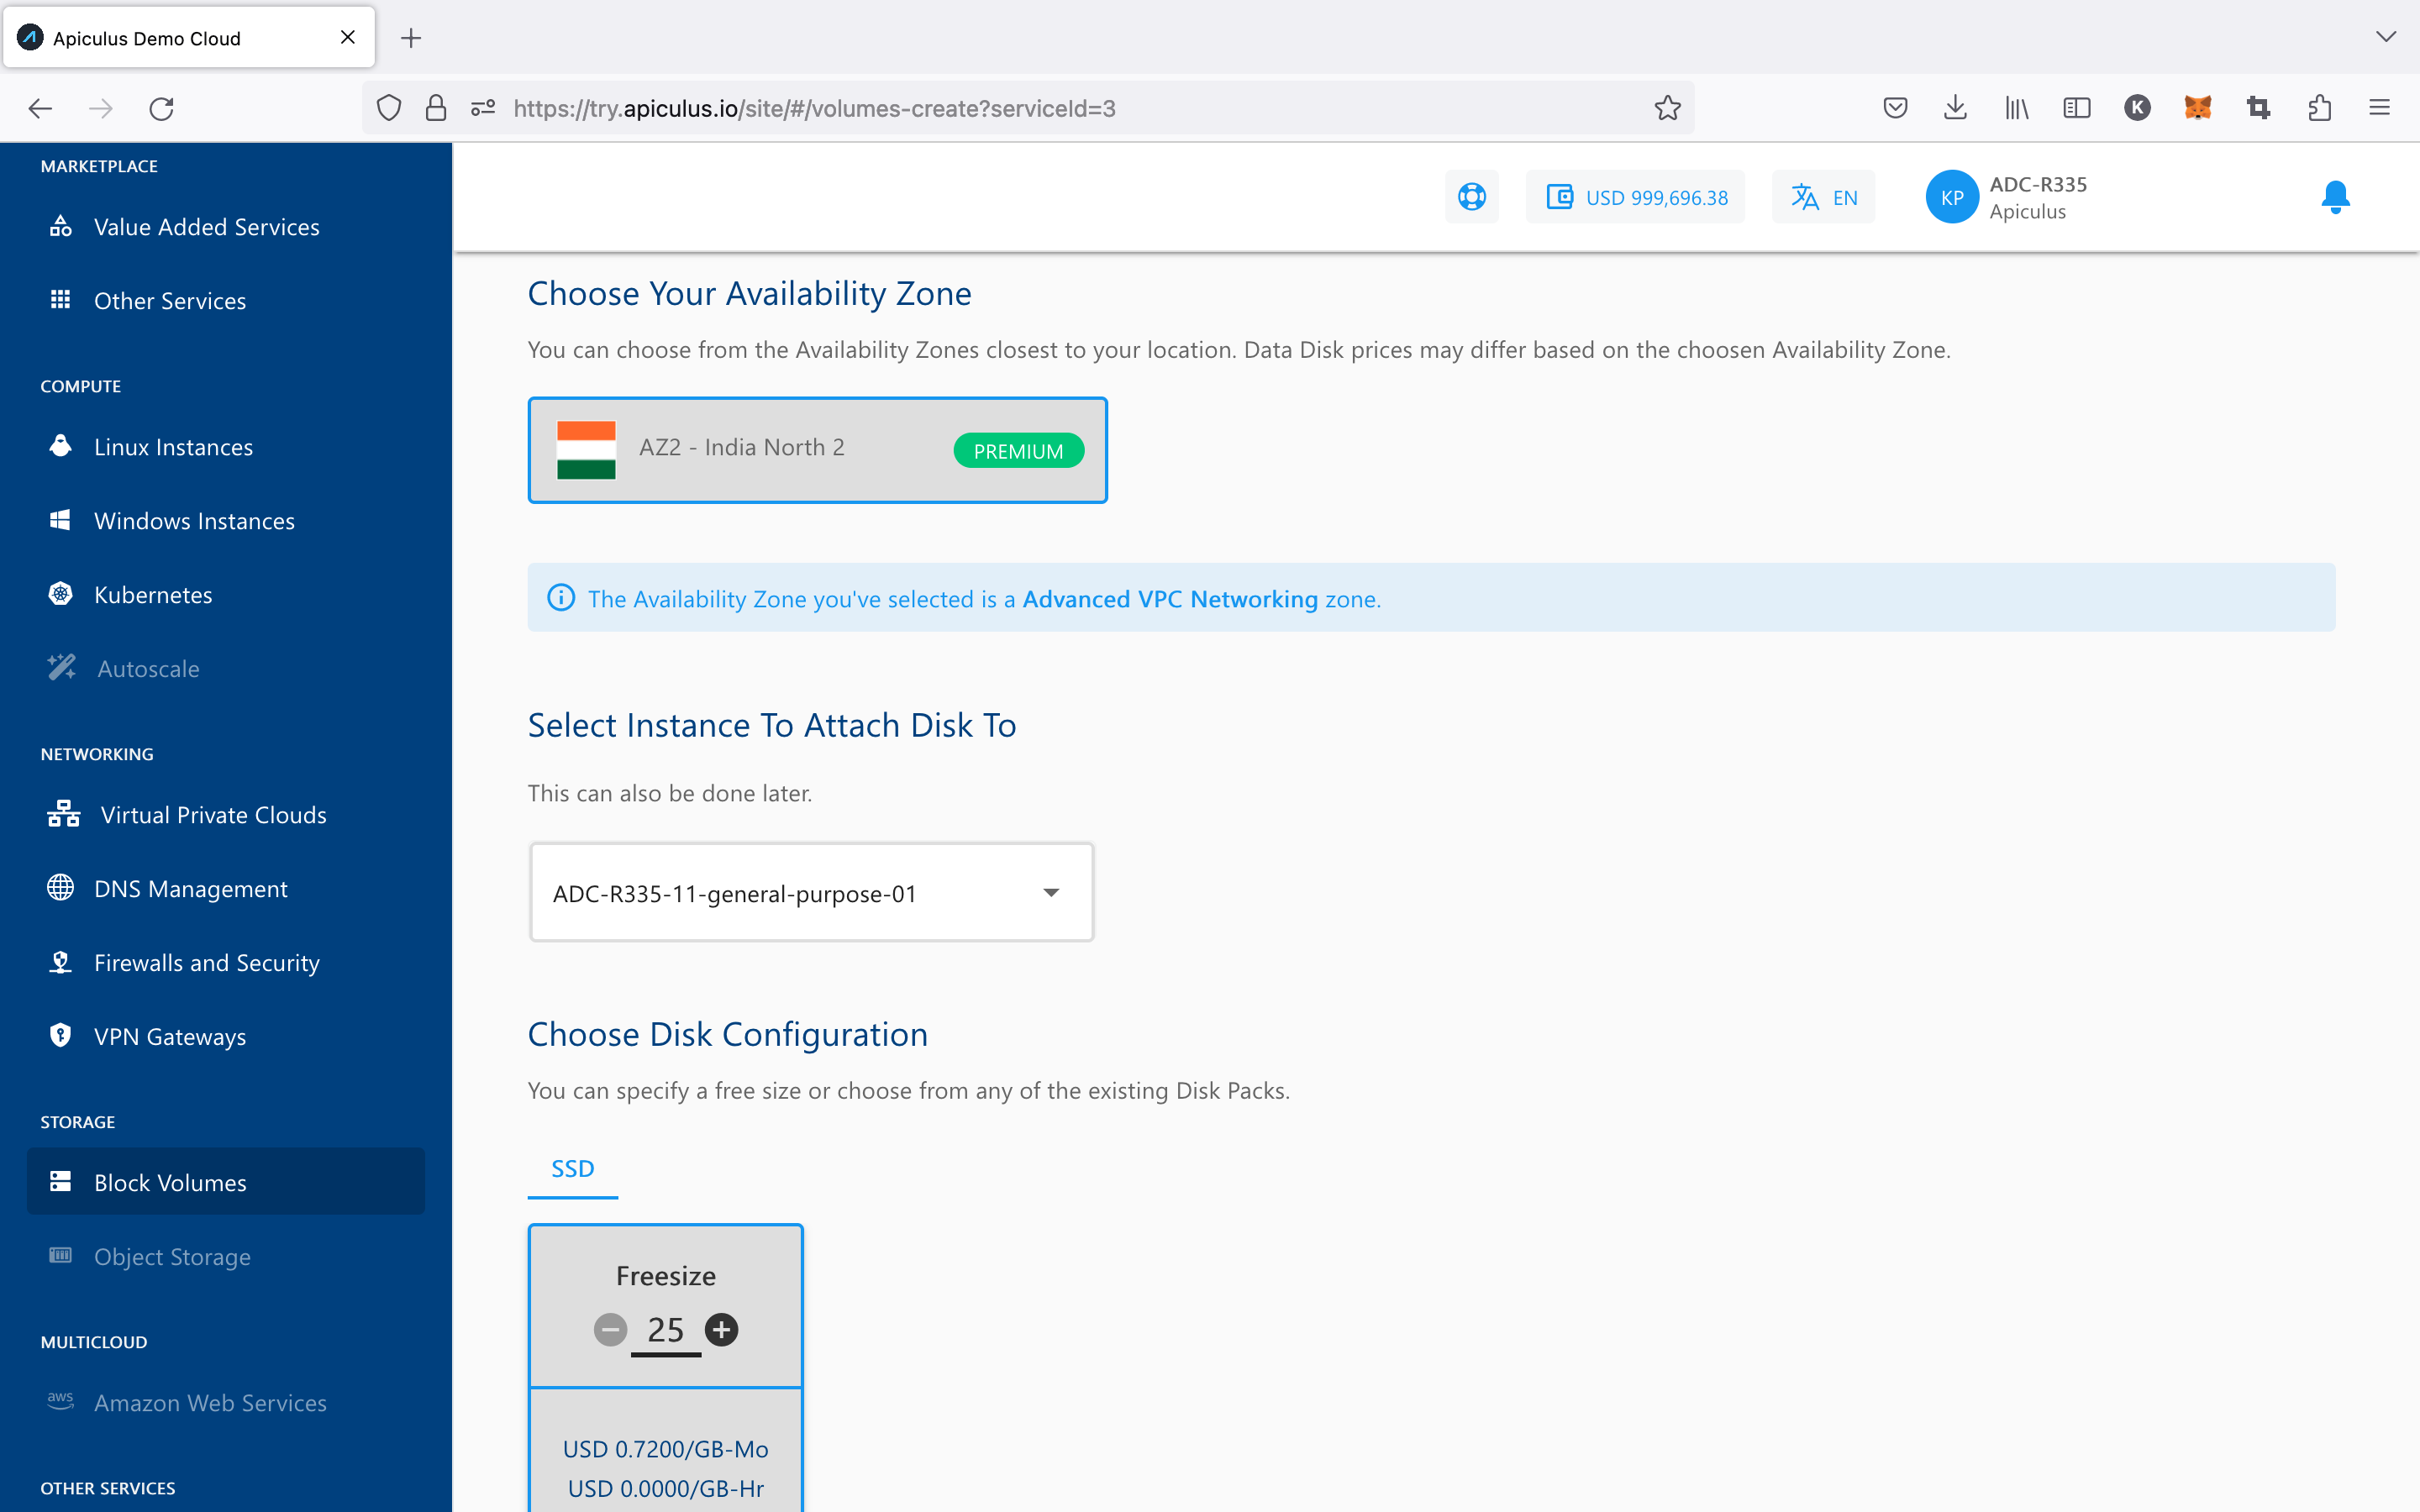
- Choose an Availability Zone.
- Select an Instance from the dropdown list to attach the disk to. (This is optional and can be done later)
- Choose the Disk Configuration from the available Disk packs, or you can use the free size option to specify the Disk configuration.
- Verify the Estimated Cost of your Data Disk based on the options that you have chosen from the Summary and Estimated Costs Section (Here, both the Hourly and Monthly Prices summary will be displayed).
- Click on the check box after going through the policies mentioned by your cloud service provider.
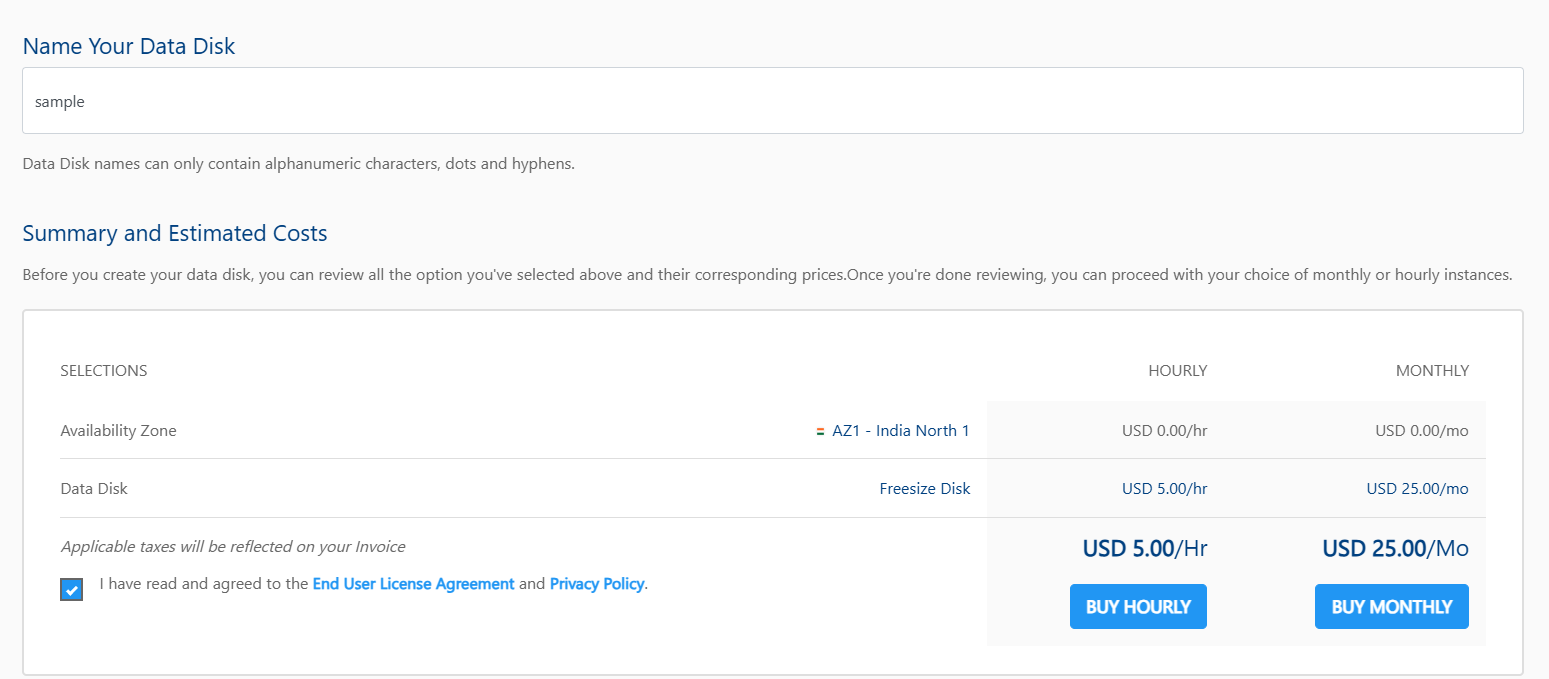
- Clicking the Buy Hourly or Buy Monthly button. A confirmation pop-over will appear, and the price summary along with any applicable discount codes.
- Apply a discount code by clicking the "Apply" button or remove it using the "Remove" button.
- Clicking the CANCEL button, this action will be canceled.
- Click the CONFIRM to create the Data Disk.
note
This process may take 5-8 minutes. You can continue using the Cloud Console during this time, but it is advised that you do not refresh the browser window.
Once ready, you’ll be notified of this purchase on your email address on record. The newly created Data Disk can be accessed from Storage > Block Volumes in the main navigation panel.