Managing Quick Plans
Setting Up a Quick Plan Category
Creating a Quick Plan starts with setting up a Quick Plan Category, which helps in organising the quick plans. Follow these detailed steps to create a category:
- Log in to the Admin Portal.
- Access the Apiculus Admin portal using your credentials. Ensure that you have the appropriate permissions to manage Quick Plans.
- Navigate to Administration Settings.
- Once logged in, locate the administration settings at the top right corner of the admin portal interface. This section allows you to configure various administrative tasks, including Quick Plans.
- Access Quick Plans.
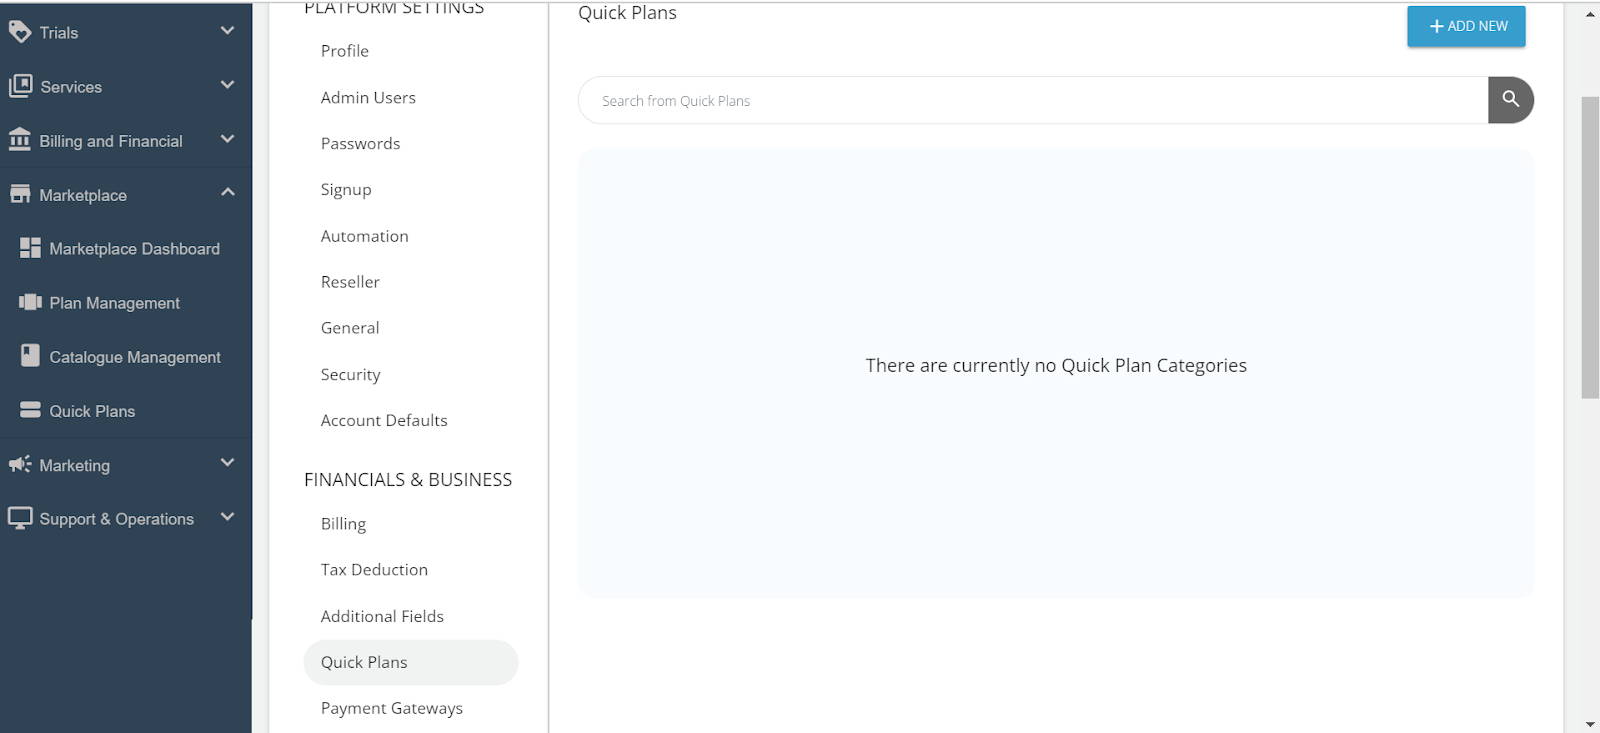
- In the administration settings, click on "Quick Plans" under the "Financials & Business" section of the Secondary List Menu. This section is where you will manage and create Quick Plan Categories.
- Create a New Category.
- Click the +ADD NEW button located at the top right of the Quick Plans page. A form will appear where you can enter the details for the new category.
- Category Name: Enter a meaningful name for the Quick Plan Category that clearly describes the type of plans it will contain.
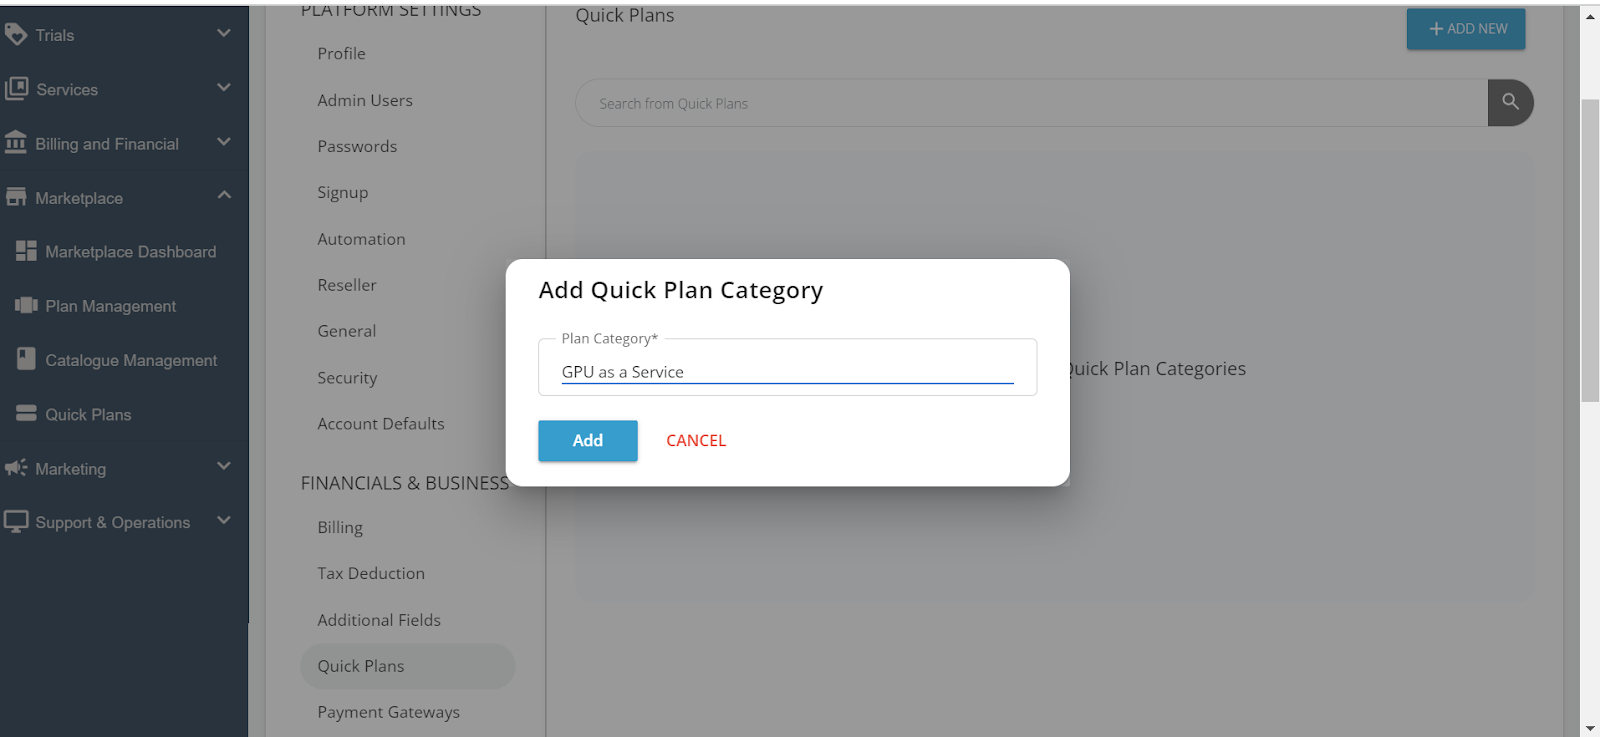
- Once you’ve filled in the necessary details, click on Add to save the category.
- Click the +ADD NEW button located at the top right of the Quick Plans page. A form will appear where you can enter the details for the new category.
- Repeat as needed.
- You can create multiple categories to organise different types of Quick Plans. Each category will help users find the Quick Plans relevant to their needs more easily.

- You can create multiple categories to organise different types of Quick Plans. Each category will help users find the Quick Plans relevant to their needs more easily.
Creating Quick Plans
After setting up your categories, the next step is to create the Quick Plans. Quick Plans are pre-configured service packages that users can purchase. The creation process is divided into five key sections. Below are the detailed steps to create a Quick Plan:
-
Navigate to the Quick Plans Section.
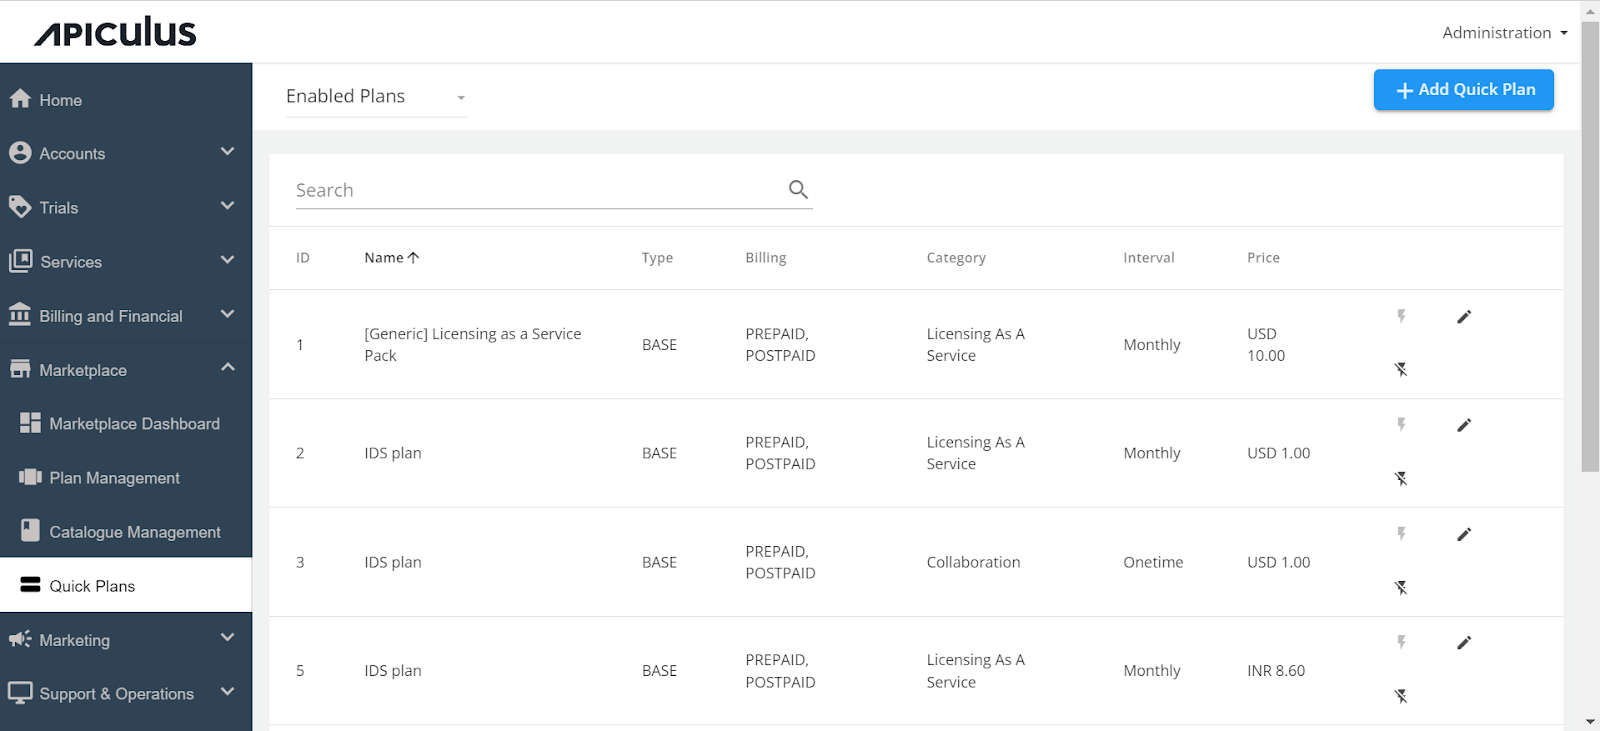
- From the main navigation menu, go to "Marketplace" and select "Quick Plans." This is where you will manage and create your Quick Plans.
- From the main navigation menu, go to "Marketplace" and select "Quick Plans." This is where you will manage and create your Quick Plans.
-
Initiate Quick Plan Creation.
- Click the +Add Quick Plan button at the top right of the Quick Plans page. This action will open a new page with a few sections that you need to complete.
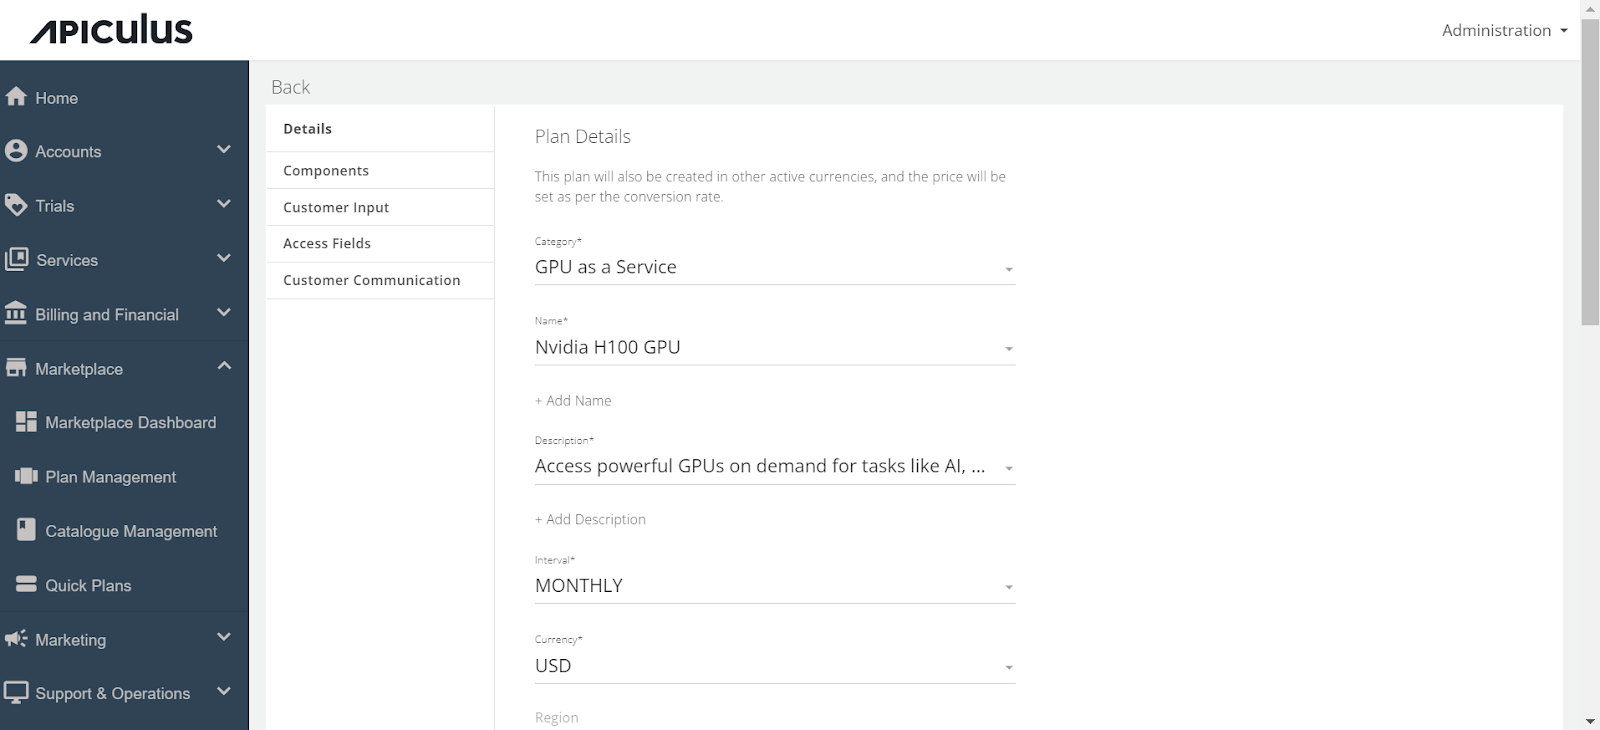
a. DETAILS Section
This section gathers the basic details about the Quick Plan.
-
Category - Select one of the previously created categories from the dropdown menu. The Quick Plan will be listed under this category for users.
-
Name - Click +Add Name to enter a descriptive name for the Quick Plan.
-
Description - Click +Add Description to provide details about what the Quick Plan offers.
-
Billing Interval - Select whether the Quick Plan is billed Monthly or One-time. This determines how the user will be charged.
-
Currency - If multiple currencies are supported in your cloud environment, choose the appropriate one from the dropdown menu.
-
Region - Select the Region.
-
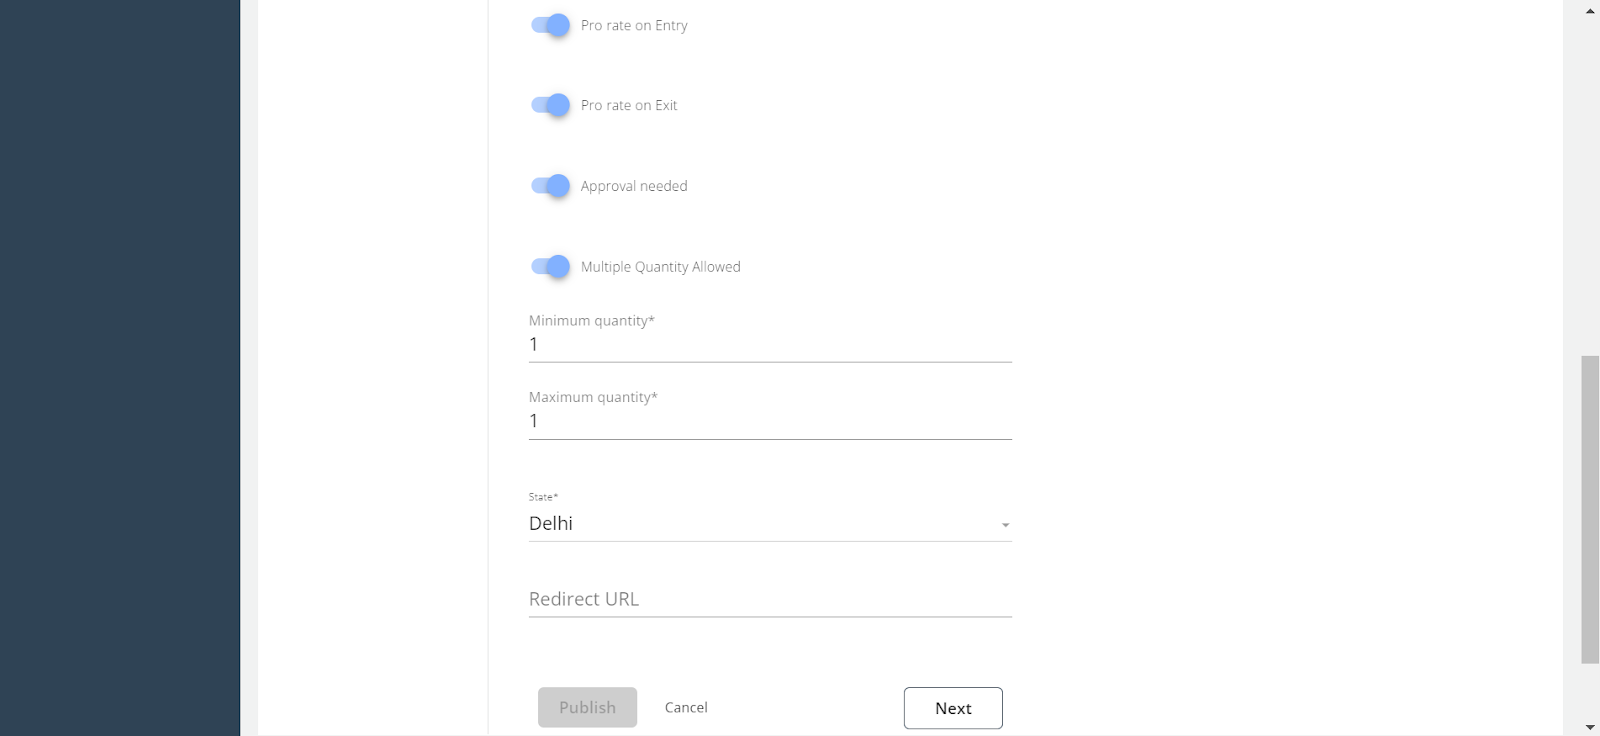
Pro-rate on Entry - Enable this option if you want to bill the user from the date of purchase rather than from the beginning of the billing month.
-
Pro-rate on Exit - Enable this option if you want to bill the user only for the days they used the Quick Plan, rather than until the end of the billing month.
-
Approval Needed - Enable this if the Quick Plan requires admin approval before it becomes active. When enabled, an email notification will be sent to admins, and the Quick Plan will only activate after the admin approval.
-
Multiple Quantity Allowed - Enable this option if you want users to be able to purchase multiple quantities of the Quick Plan. The number of subscriptions generated will correspond to the quantity selected by the user.
-
Redirect URL - To manage the quick plan, If you want users to be redirected to a specific URL, specify that URL here.
-
After completing this section, click the Next button to proceed to the Components section.
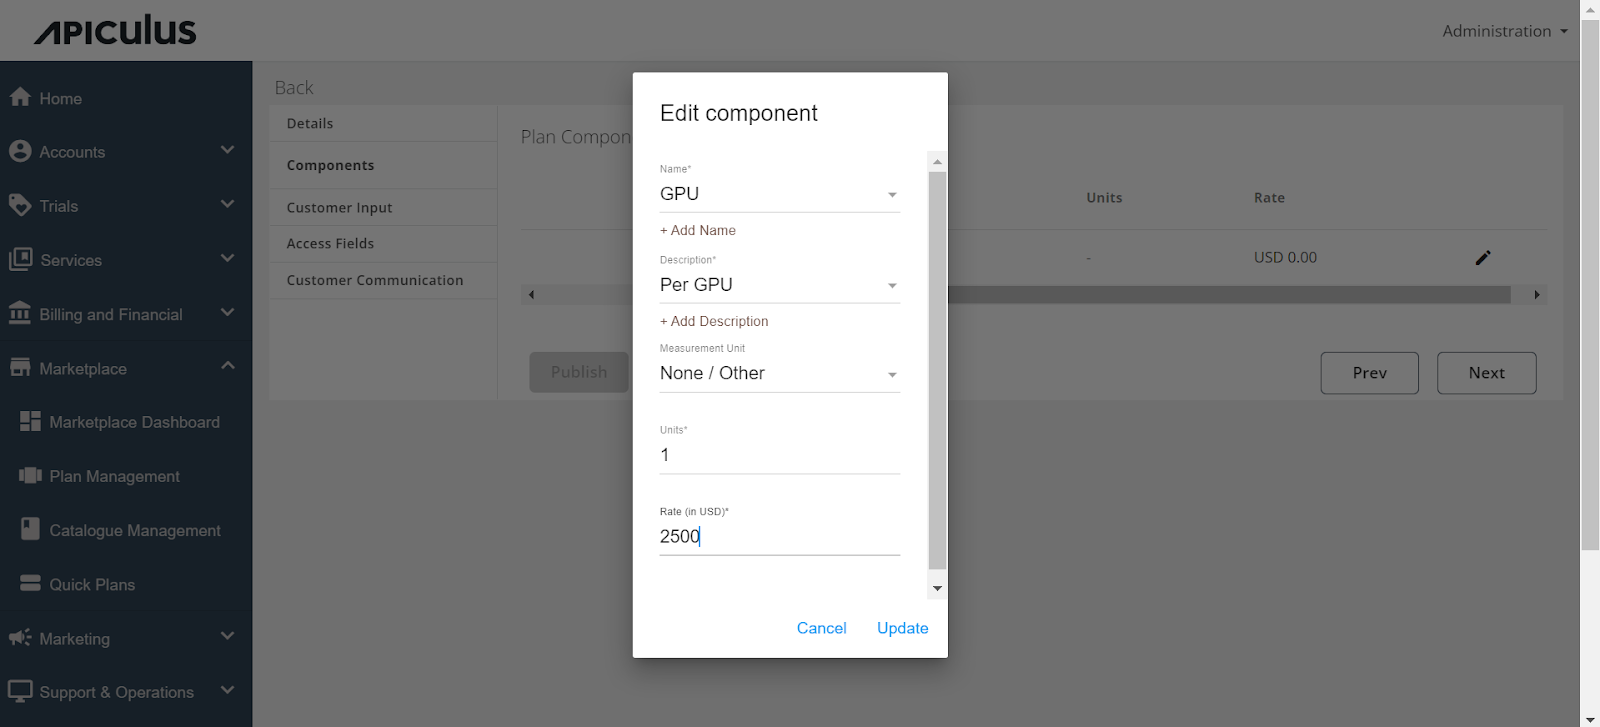
b. COMPONENTS Section
This section allows you to define the components of the Quick Plan, which could include different service or feature bundled in the plan.
-
Component Name - Click the pencil icon to edit the component, then click +Add Name to enter the name of the component.
-
Description - Click +Add Description to provide details about what this component includes.
-
Measurement Unit - Select a measurement unit from the dropdown list (e.g., GB, MB, Number, Count). If the required unit isn’t available, select "None/Other."
-
Units - Specify the number of units included in this component (e.g., 10 GB of storage).
-
Rate - Enter the price per unit of this component. This is the amount the user will be charged for each unit they consume.
-
Once all details are filled in, click Update to save the component information, then click Next to move to the Customer Input section.
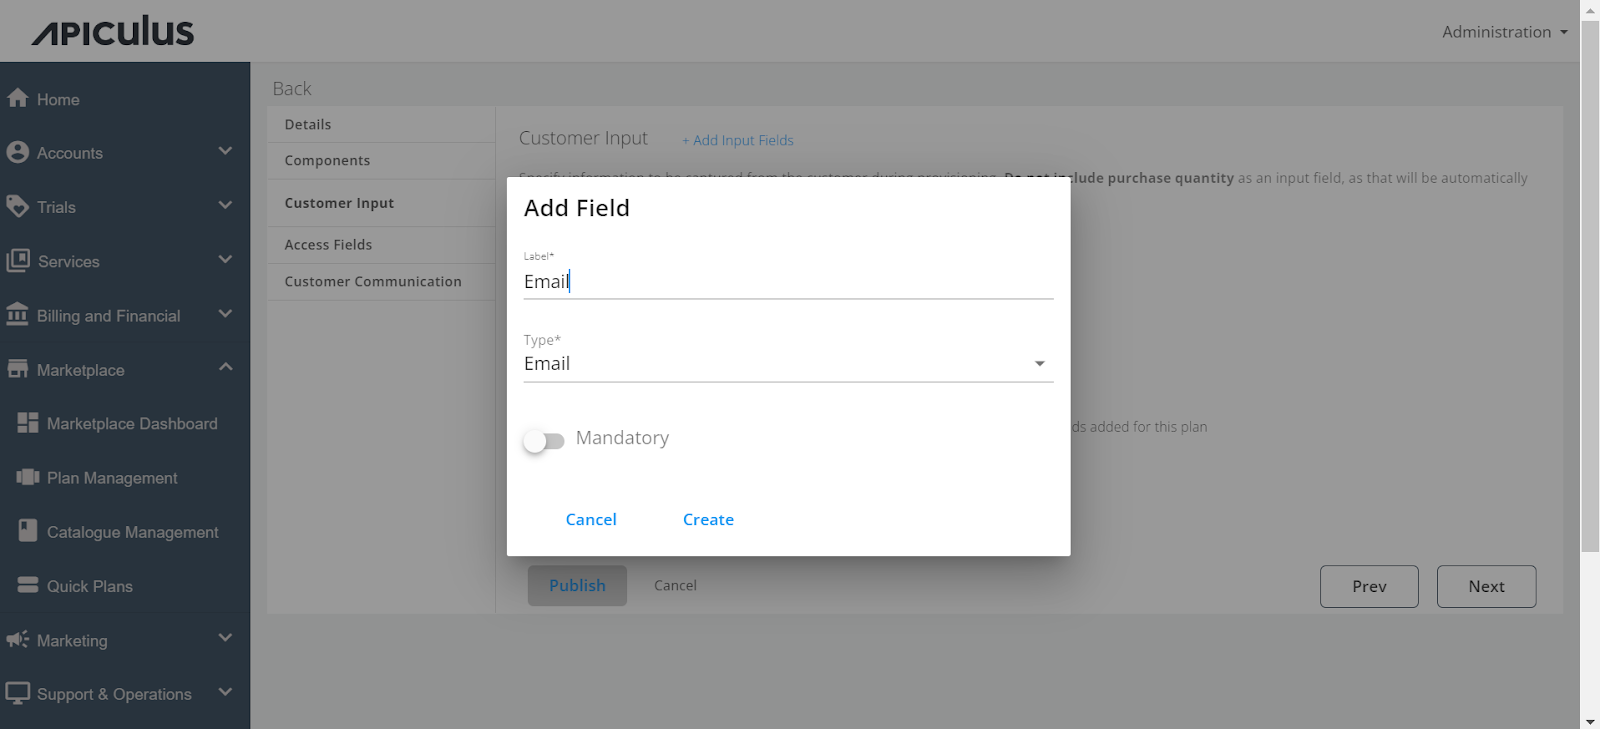
c. CUSTOMER INPUT Section
In this section, you can create custom fields to capture specific information from the customer when they purchase or provision the Quick Plan.
-
Add Input Fields - Click +Add Input Fields to open a popover where you can create a new field.
- Field Name - Enter the name of the field (e.g., "Email, Org Name").
- Field Type - Select the type of field (options include Email, Password, URL, and Text).
- Mandatory Field - Indicate whether this field is mandatory for the user to fill out.
-
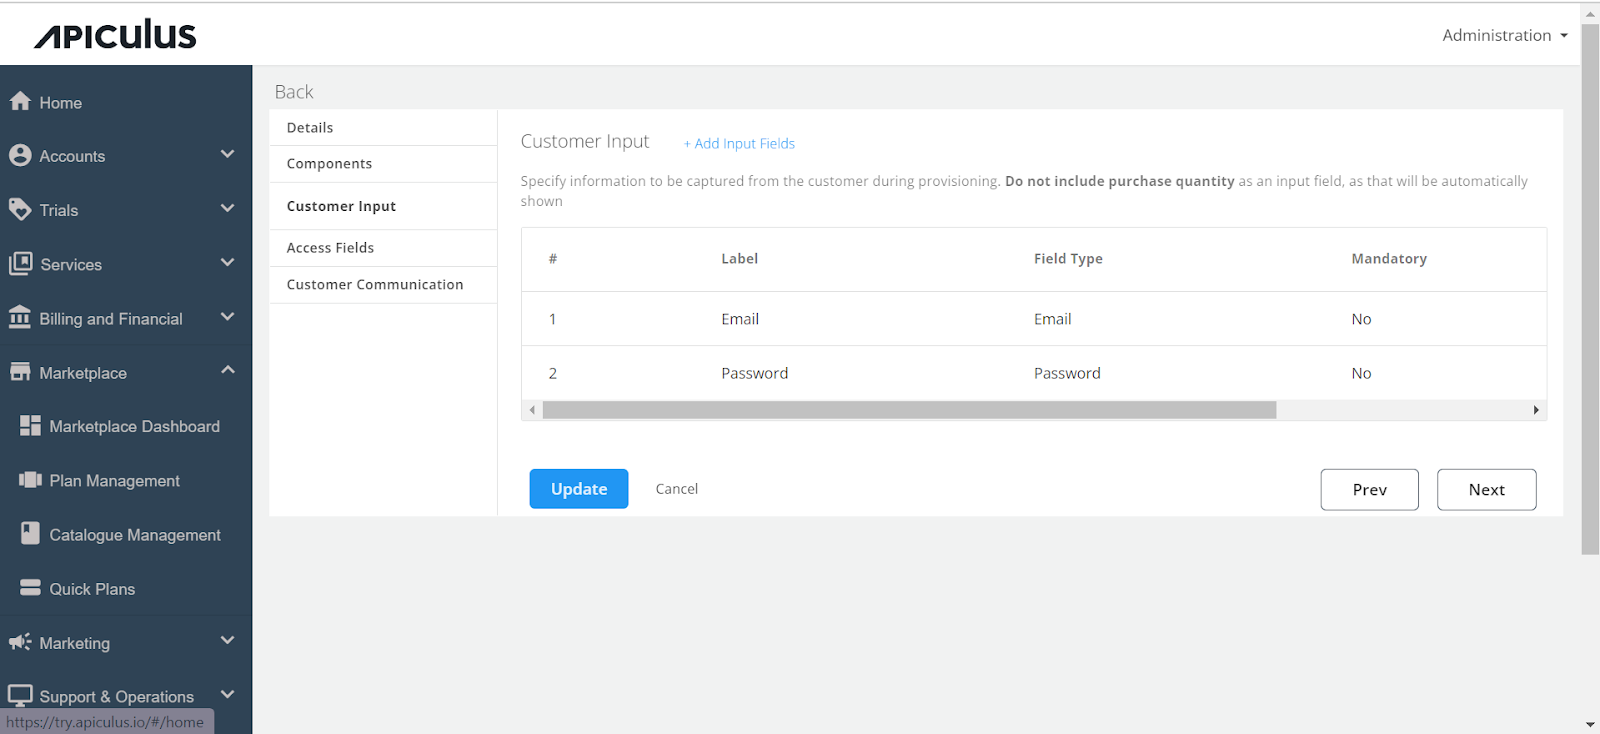
You can add multiple fields if needed to gather all the required information from the user.
The Customer Input section is not mandatory, depending on the requirement, you can create these fields.
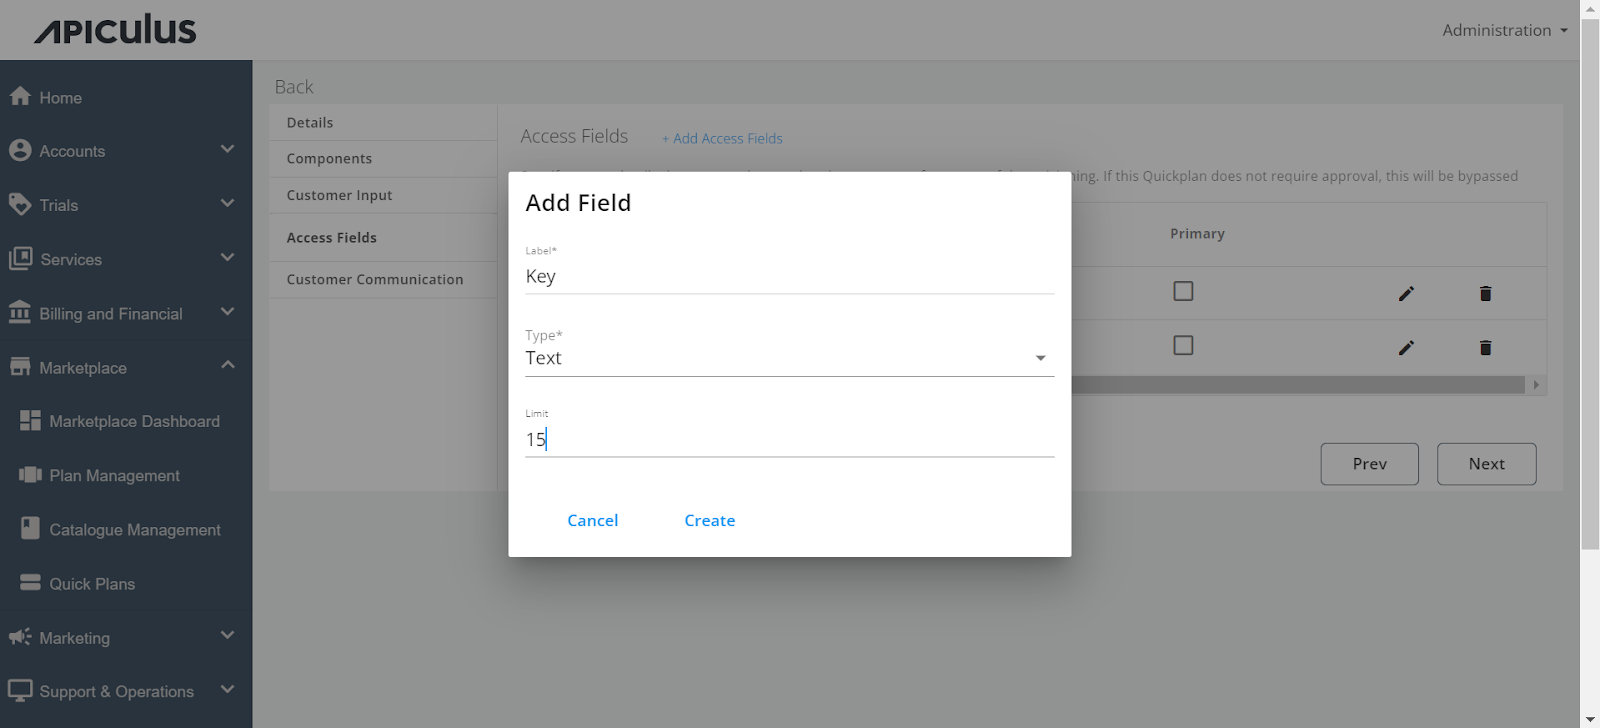
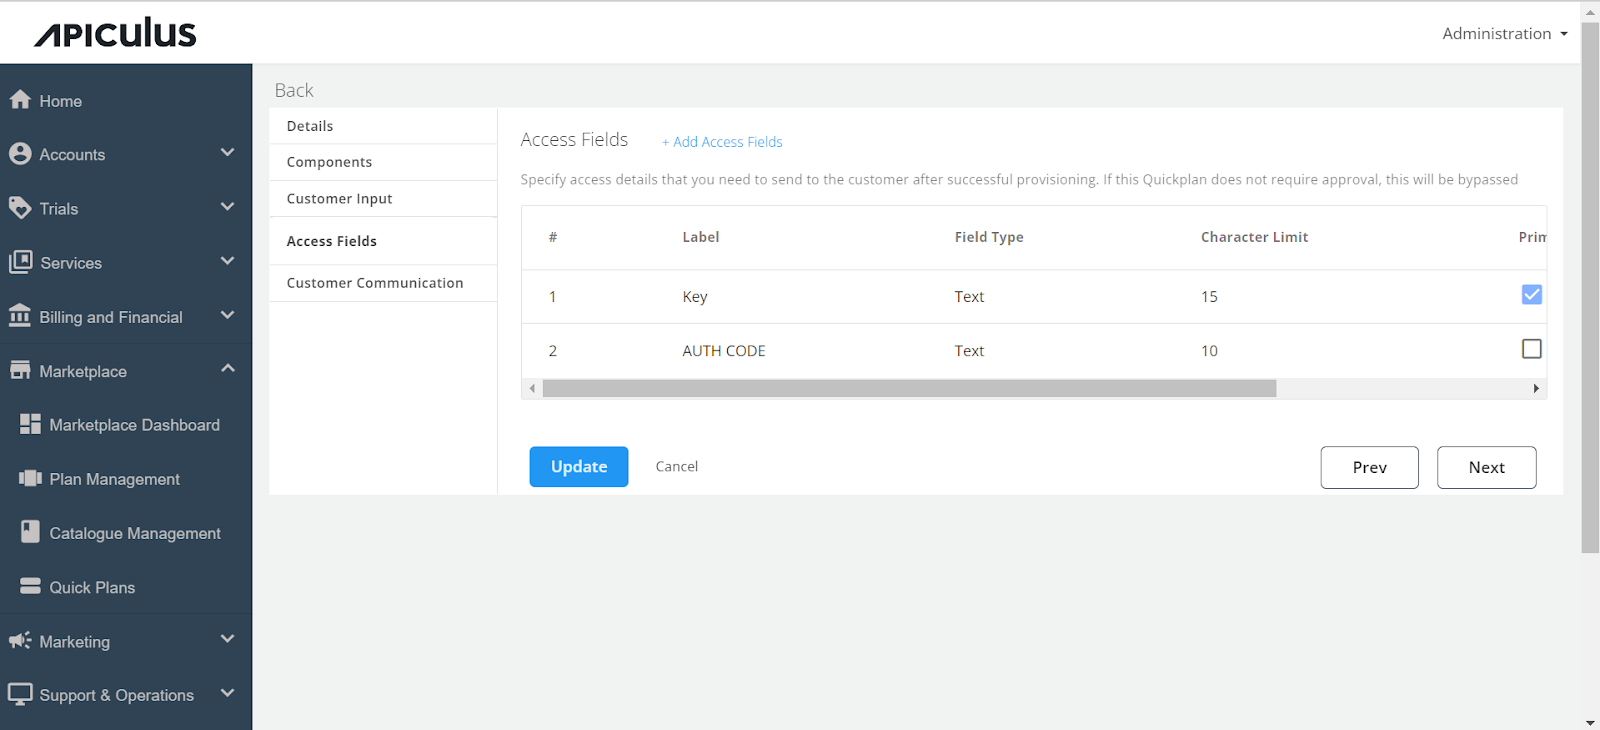
d. ACCESS FIELDS Section
This section is used to create fields that will pass information to the end user, such as keys or codes required for accessing the service.
-
Add Access Fields - Click +Add Access Fields to open a popover where you can create these fields.
- Field Name - Enter the name of the field (e.g., "License Key").
- Field Type - Choose the appropriate type for the field (Email, Password, URL, or Text).
- Field Limit - Set a limit if needed (e.g., character limit for a code).
- Primary Field - You can designate a field as primary if it’s the most important piece of information.
-
Multiple access fields can be added and managed as necessary. You can also delete or update fields after they’ve been created.
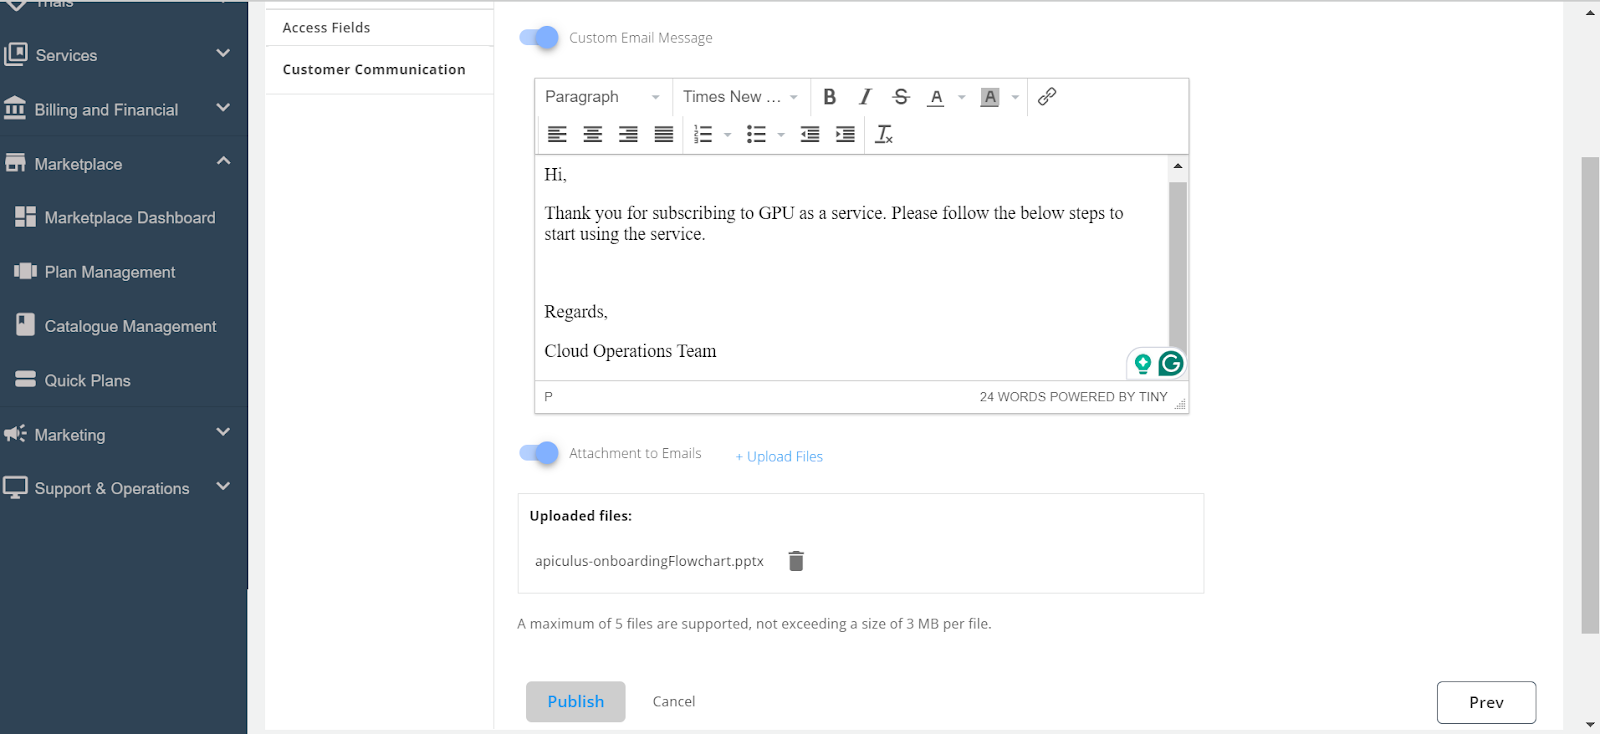
e. CUSTOMER COMMUNICATION Section
This final section allows you to customise the email communication sent to customers when the Quick Plan is provisioned.
-
Custom Email Message - Enable this switch if you want to send a custom message along with the system-generated provisioning email.
-
Email Text - Enter the text you want to send, or you can copy and paste the message from another source.
-
Attachment to Emails - Enable this switch if you want to include attachments in the email. Click +Upload Files to select and upload files from your system.
-
After entering the necessary information, click the Publish button to finalise and make the Quick Plan available.
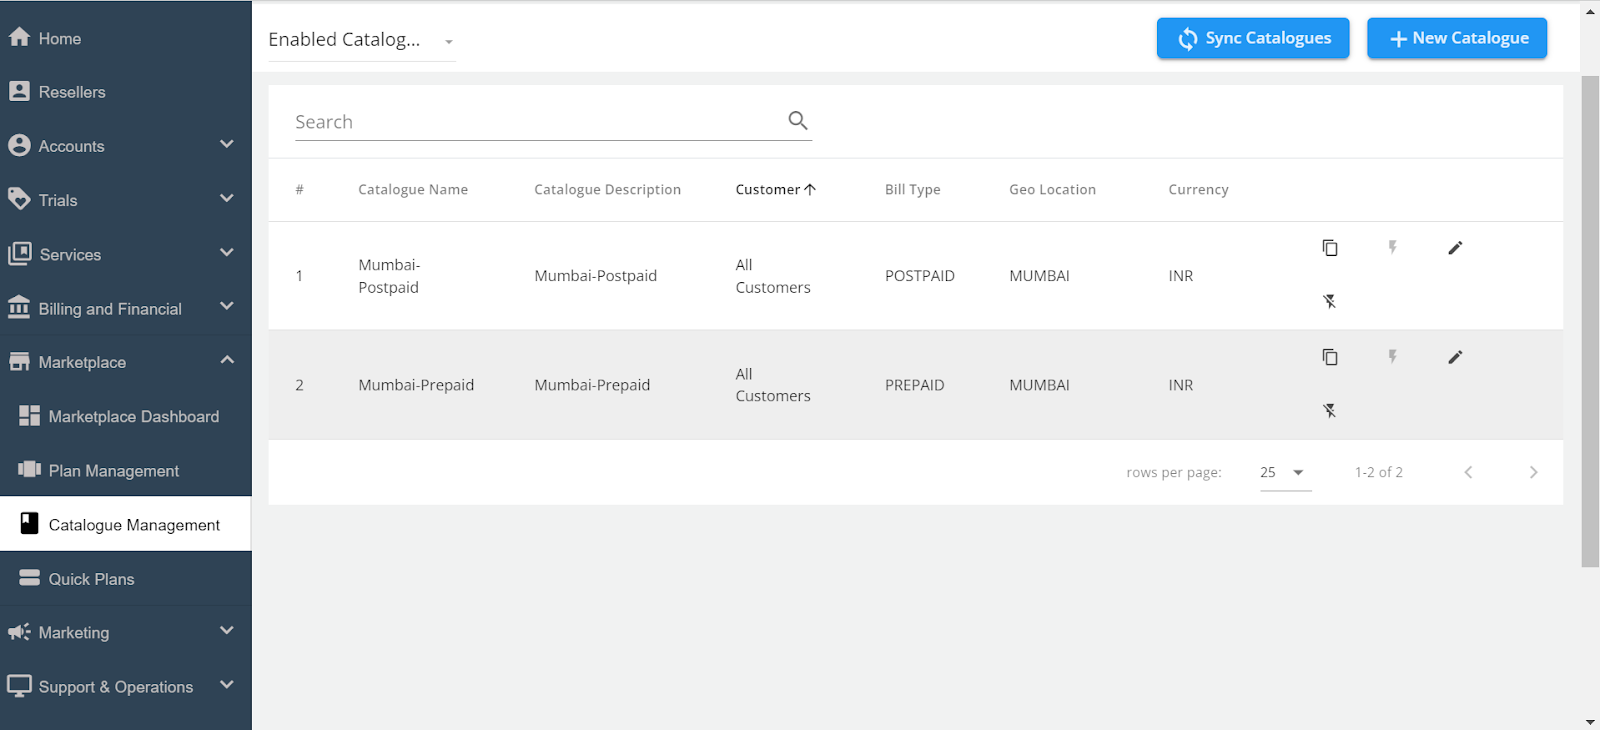
Adding Quick Plans to a Catalogue
Once you’ve created your Quick Plans, you need to add them to all the catalogues that are present so that the quick plan is available for the end users to purchase. Here’s how:
-
Edit the Existing Catalogue.
- In the Admin portal, locate the catalogue you want to update. Click on the pencil icon next to the catalogue name to open it for editing.
- In the Admin portal, locate the catalogue you want to update. Click on the pencil icon next to the catalogue name to open it for editing.
-
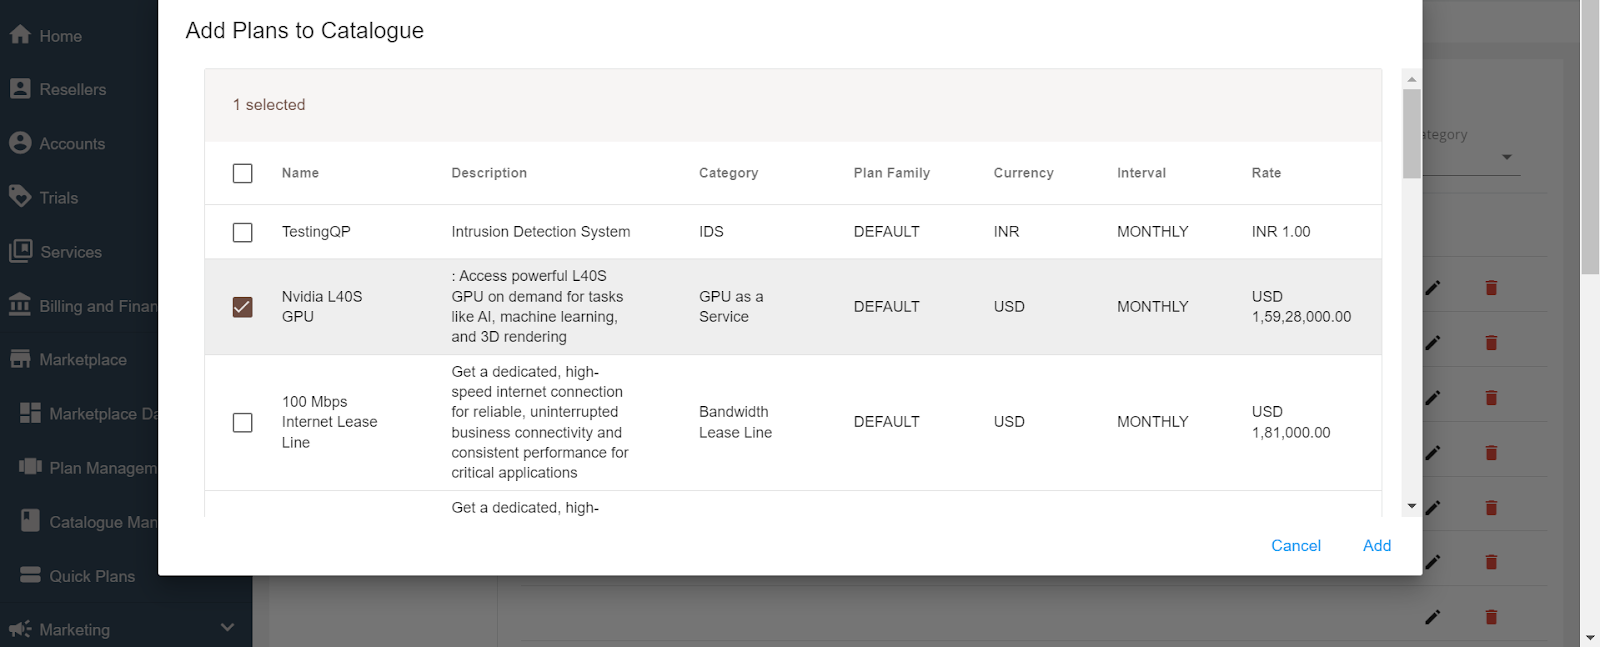
Add Quick Plans to the Catalogue.
-
Navigate to the "Plan" section within the catalogue editor. Click the +Add More Quick Plans button to open a list of available Quick Plans.
-
Select the Quick Plans you want to add to this catalogue. You can select multiple plans if necessary.
-
Click the Add button to include these plans in the catalogue.
-
-
Sync the Catalogue.
After adding the Quick Plans, it’s crucial to synchronise the catalogues to ensure the plans are visible to end users. Click the Sync Catalogues button at the top of the page.
Once the synchronization is complete, the newly added Quick Plans will be available for purchase by end users.